momgineer: crafts
Showing posts with label crafts. Show all posts

Get crafty with a Thanksgiving turkey or bookmark!

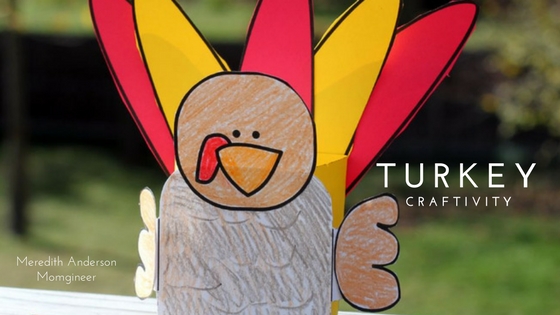
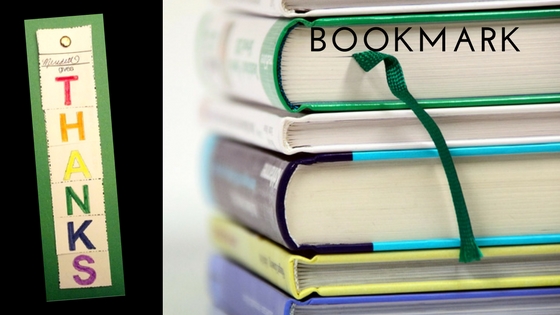
Turkey Craft for Thanksgiving and Thankful Bookmark

A Thanksgiving turkey craft or a thankful bookmark are two fun hands-on ways to celebrate the holiday this season. I have created simple templates that are great for practicing fine motor skills.


The turkey thanksgiving craft includes everything you need to put together this gobble gobble cutie! Why not use it on your Thanksgiving kids' table as a centerpiece? If you have craft feathers, feel free to use them as well.

https://www.teacherspayteachers.com/Product/Turkey-Craftivity-1521327?utm_source=Momgineer%20Blog&utm_campaign=Turkey%20Craftivitiy

I have outlined all the steps with photos so that you know exactly how to put it together.

Students Can Be Thankful this Thanksgiving


This is the perfect time of year to reflect on the things we are thankful for. It's a good habit for kids to get in as well, but it can feel overwhelming if they don't know where to start. I created this Thankful Craftivity Bookmark as a guided way for kids to explore who and what they are thankful for. It makes a perfect bookmark!
https://www.teacherspayteachers.com/Product/Thanksgiving-Craftivity-Bookmark-950581?utm_source=Momgineer%20Blog&utm_campaign=Thanksgiving%20Bookmark#


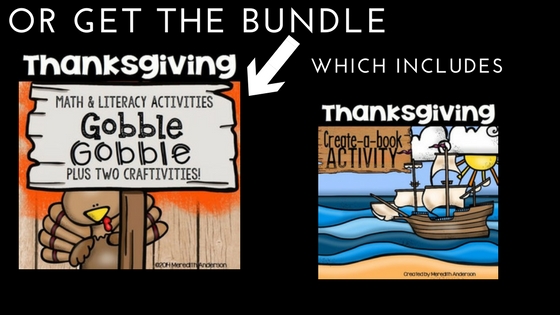
Not only does the Thanksgiving Activity Bundle include the above activities, it includes so many fun and cross-curricular activities for kids in K-2. Label the turkey, do math and ELA activities, and learn about the first Thanksgiving.


 Click this link to go right to the Thanksgiving Activity Bundle:
https://www.teacherspayteachers.com/Product/Thanksgiving-Activities-for-K-2-388641?utm_source=Momgineer%20Blog&utm_campaign=Thanksgiving%20Activities


STEM Tale - Hansel and Gretel Trap the Witch

Fairy Tale STEM Activity for Hansel & Gretel

Hansel and Gretel can outsmart the witch and escape (with a little help from your students)!


Materials Needed for this STEM Fairy Tale Activity

  • printable characters or figurines of different sizes
  • various recyclable materials (cereal boxes, cups, etc.)
  • other crafting supplies (craft sticks, pipe cleaners, straws, etc.)

Before Getting Started with the STEM Tale


STEM tales work best if you read the original fairy tale first (or do your own storytelling!). This also leads to great discussions during the engineering process, as kids love to compare the original story with the new version.

Print and assemble the characters. These have been designed so that the kids are smaller than the witch and will be able to escape the trap, while the witch will not.

Fairy Tale STEM with the Engineering Design Process 

I have designed STEM tales so that as students read the story, they will follow the engineering design process. First, they need to identify the problem (the kids need to escape from the witch). For this challenge, students will need to measure the dimensions of each character and then design their witch trap so that the kids can pass through but the witch can't. They build the trap around themselves and then escape, leaving the witch trapped.

Design a Trap for the Witch

After thinking of various witch traps, the kids will then choose one they can build. They will plan out the materials and design, and then construct their prototype based on the plan. The above trap is made with a cereal box with the spaces cut out from it (cuts had to be measured). The below trap is made with straws and pipe cleaners (straw spacing had to be determined and applied).

Test the STEM Tale Prototype


After the prototype is built, the kids then test it out. If something didn't work right, it's time to go back and improve the design. If the witch can escape, the design needs to be improved. If Hansel and Gretel are trapped in with the witch, the design also needs to be improved.

STEM tales are a great way to foster teamwork and problem-solving. This STEM tale usually inspires amazing creativity and excitement from the littlest engineers.

To find the full resource, which includes an 8-page booklet, printable characters, check list for self-evaluation, and tips, visit this link:
https://www.teacherspayteachers.com/Product/STEM-activity-Hansel-and-Gretel-Fairy-Tale-Challenge-2370801?utm_source=Momgineer%20Blog&utm_campaign=STEM%20tale%20gear%20series


Pin the idea for later:

Fairy Tale STEM - Hansel and Gretel Trap the Witch! Help the kids trap the witch so they can escape. Can you design a trap? Meredith Anderson Momgineer


To read more about how to conduct a STEM challenge, visit this post:

http://momgineer.blogspot.com/2016/09/how-to-run-successful-stem-tale.html

To see all posts in this series, click here:

STEM Tales Blog Series


STEM Tale - Rapunzel Engineers an Escape

Fairy Tale STEM Activity for Rapunzel

Rapunzel can escape the tower with a little help from your students!


Materials Needed for this STEM Fairy Tale Activity

  • cardboard tubes
  • printable character
  • various recyclable materials
  • other crafting supplies (craft sticks, pipe cleaners, pompoms, etc.)


Before Getting Started with the STEM Tale

First your students will craft a tower. This is a fun standalone activity. You don't even have to let your kids know there will be another part to the challenge after this. Use long cardboard tubes from paper towel rolls (or tape TP rolls together). Cut out a window near the top. Decorate as desired. Washi tape is always fun for this activity!

STEM tales work best if you read the original fairy tale first (or do your own storytelling!). This also leads to great discussions during the engineering process, as kids love to compare the original story with the new version.

Fairy Tale STEM with the Engineering Design Process 

I have designed STEM tales so that as students read the story, they will follow the engineering design process. First, they need to identify the problem (Rapunzel needs to escape from the tower). Then they need to think of some ways she could get down. Allow their imaginations to soar! I have had kids think of everything from a water slide to a parachute to a zip line and even a hang glider.

Design an Escape for Rapunzel 

After thinking of some ways Rapunzel can escape, the kids will then choose one they can build. They will plan out the materials and design, and then construct their escape route based on the plan.


After the prototype is built, the kids then test it out! If something didn't work right, it's time to go back and improve the design.

STEM tales are a great way to foster teamwork and problem-solving. This STEM tale usually inspires amazing creativity and excitement from the littlest engineers.

To find the full resource, which includes an 8-page booklet, printable characters, check list for self-evaluation, and tips, visit this link:

https://www.teacherspayteachers.com/Product/STEM-activity-Rapunzel-Engineers-an-Escape-STEM-tale-2164189?utm_source=Momgineer%20Blog&utm_campaign=STEM%20tale%20gear%20series


Pin the idea for later:
Fairy Tale STEM - Rapunzel Engineers an Escape! Help Rapunzel get out of her tower and see the world. Can you design an escape route for her? Meredith Anderson Momgineer

To read more about how to conduct a STEM challenge, visit this post:

http://momgineer.blogspot.com/2016/09/how-to-run-successful-stem-tale.html

To see all posts in this series, click here:

STEM Tales Blog Series


How to Use Fidget Spinners for a STEM Challenge

Fidget Spinners Driving you Crazy?

The whir might have faded to background noise to you at this point, or maybe you can't get it out of your head. Before you ban fidget spinners completely, why not put a spin on the fidget fad and engage your students in a STEM challenge?

Disclaimer: I may earn a small commission for my endorsement, recommendation, testimonial, and/or link to any products or services from this website. Your purchase helps support my work in bringing you downloads of value and information about educational resources. The link below is an Amazon affiliate link. You can read my full disclosure here.

Fidget Spinner STEM Challenge

Turn that Obsession into a Learning Opportunity

How to Use Fidget Spinners for a STEM Challenge. Learn the science first, then follow the engineering design process. Use math to analyze and improve the design! | Meredith Anderson - Momgineer

Start off by learning the science of rotational motion. I have provided informational text about inertia, angular velocity, torque, and more so that students first get an understanding of the spinners from a scientific perspective. This is reinforced with hands-on experiments and demonstrations, such as noting how the center of mass will change based on where weights are placed on an object.

Follow the Engineering Design Process

How to Use Fidget Spinners for a STEM Challenge. Learn the science first, then follow the engineering design process. Use math to analyze and improve the design! | Meredith Anderson - Momgineer
The engineering design process (EDP) is the method engineers use to solve problems. It has some similarities to the Scientific Method so if you haven't used the EDP before, read through the steps:

ASK - What is the problem? Has it been solved before?

IMAGINE - Some solutions to the problem. How large will your spinner be? How many arms will it have? What materials are available to use? Do you have design constraints?

PLAN - Sketch your design and label it.

CREATE - Build the design and then test it. How long does it spin? Does it fit comfortably in the hand to spin it? Is it assembled well and symmetric? Record and analyze the data.

IMPROVE - Can you make it spin more smoothly or for longer? What might be causing friction?

SHARE & REFLECT - Share your design with someone else. What do they think of it? Could their feedback help you improve the spinner even more?

Math Extension Activity 

How to Use Fidget Spinners for a STEM Challenge. Learn the science first, then follow the engineering design process. Use math to analyze and improve the design! | Meredith Anderson - Momgineer

How much would it cost to make 1000 spinners? Students create a Bill of Materials (BOM), calculate the cost to assemble the spinner, and find the volume to calculate the cost of the packaging. Why is this important? Engineers need to be mindful of costs when creating a new product. What if the cost of the raw material goes up? How can you cut costs in a different way. Packaging design is a whole branch of engineering - think about all the different packages you encounter in goods you purchase. An engineer was involved in the design of that package, cost was a very important factor in the package design.

Get Creative with Marketing and Graphic Design

How to Use Fidget Spinners for a STEM Challenge. Learn the science first, then follow the engineering design process. Use math to analyze and improve the design! | Meredith Anderson - Momgineer
Students need to think about who might buy their spinner and then create a marketing campaign to hook potential buyers! They can also create a fun design on a traditional spinner to catch a shopper's eye. Why is this step important? You can have the best product in the world, but if nobody knows about it, it won't sell and ultimately will fail in the market.

Why STEM?

How to Use Fidget Spinners for a STEM Challenge. Learn the science first, then follow the engineering design process. Use math to analyze and improve the design! | Meredith Anderson - Momgineer
Not only do students work in small teams, which helps foster community and teamwork, but they also learn to fail and embrace a growth mindset. You will see amazing problem-solving and creative thinking with this project. Students use higher-order thinking skills in their STEM projects, and they can use those skills in other academic areas as well. Because there are so many possible solutions to this problem, there are many avenues to success. You may even inspire a student to come up with a new and unique spinner that is better than commercially available ones!

Find it on TpT 

The full resource can be found on Teachers pay Teachers. It includes everything shown here and more. There are samples, teacher notes, and planning pages to help you make this a successful challenge in your classroom or at home. If you are looking for some tips and tricks to try this on your own, though, read on for a video.

https://www.teacherspayteachers.com/Product/Fidget-Spinner-STEM-Challenge-Follow-the-Engineering-Design-Process-3141202?utm_source=Momgineer%20Blog&utm_campaign=Fidget%20Spinner%20

Easy Shopping Links

Amazon affiliate links:
Neodymium Magnets or here
Skate Bearings
Gorilla Tape 
Tin of Marbles or here

Watch the Video to Learn More 

Get an overview of the challenge and some DIY tips on YouTube!

How to Make Homemade Scratch Art Paper in 3 Easy Steps

Easy DIY Scratch Art Paper 

Scratch art paper is fun to use, but I think it might even be more fun to make! My kids gave this project two thumbs up.

Gather Materials for your Scratch Art Paper


  • card stock
  • crayons
  • black tempera paint
  • dish soap
  • paint brushes, foam brushes, or sponges   
  • bamboo skewers or wooden scratch sticks from a scratch art set

Start Coloring!

Cut the card stock in half or even quarters if you want the sheets to be more manageable. Use the crayons to color the entire page. It's particularly fun to use all the colors of the rainbow!

Scratch Art Paper Step 1: Color a good amount of the card stock!

Mix it Up

Use a 50/50 mixture of black tempera paint and dish detergent and paint over the colors (a foam brush works well).
Scratch Art Paper Step 2: Paint over your colors

Create Your Scratch Art Designs

After the paint has dried, it's time to scratch off the black layer! This is the fun part!


Pin this post to easily come back to it later!

DIY scratch art paper in 3 easy steps! | Meredith Anderson - Momgineer

100th Day of School STEM Activities for Upper Elementary


Are you getting excited about the 100th day of school? This is a fun milestone to celebrate to see how far you've come. Whether you are in the classroom or homeschool, why not take the time to reflect on your year so far and where it is going. I invite you to take a moment to think of all of the challenges you have faced and how you have handled them, and know that you have the strength to face them head on moving forward.

100th Day of School? Heck Yessss!

Here is a fun way to celebrate, that even your young students can enjoy. Build a 100 block tower. You may want to have them explore first, to see how they can come up with a stable base, and how to best make it as tall as they can. If the tower keeps crashing, remind them of a time when they struggled but were able to keep at it and succeed. Maybe their tower needs to be a little shorter to be stable and strong, and that's okay!

For your older kids, this is a fun arts and craft activity that can be modified from a typical paper link chain. Why not try a 100 link web? Working together, your students can create a web, and then all hold a piece of it out. What happens when everyone supports the web? It is strong and has a defined shaped. What if you let go? It might not look like much of anything. Working together helps us reach our goals!
 

Are you a 5th grade teacher?

If you have 5th graders, the 100th day in 5th grade is also the 1000th day of school. How amazing is that? What an amazing feat! I created a fun little resource just for 5th graders on their 1000th day of school:


100th Day of School STEM Challenges on Teachers pay Teachers

If you are looking for even more 100th day celebration ideas, I would love for you to visit 100 Days of School STEM Challenges! Included are a variety of STEM challenges such as the two listed above, as well as many others to help you celebrate this fun day in style! Instructions, photos, and recording pages are included, as well as a "100 Days of Learning" banner:


Celebrate yourself! You are rocking it. You have made it 100 days and are over the hump. Warmly,

End of Year Memory Books: POP UP Style!

I have been working on this pop-up book for awhile now and am so excited it's finally finished! Are you looking for something a little different in your end of year memory books this year? How do pop-up memory books sound?

There are base pages (with guides for gluing in the images) as well as the pop up image art. The above pages show the basic book, but I have included several more pages that you can add in based on what you'd like to include.
Fill out the base page and pop up inserts. Color as desired.
Cut out the pop up inserts and fold in half. Fold back the tabs.
Glue in the tabs. Here is the page opened op.
The pop up inserts fold snugly into the book as it closes.
Trim wish washi tape for a fun touch!
This is a fun way to end your year. Pop up books always bring a smile, and the creation of their very own pop up book is a way to instill creative confidence! There is even a page for homeschoolers. I have labeled this activity for grades 2-5, though if you have classroom helpers you could do this with first graders as well. Students in grades 4 and 5 should be able to complete this project independently, while second and third graders might need a little assistance making sure their folds/flaps are creased well and lined up to fold into the book correctly.

You can follow the steps I've shown above to create your own book, or purchase my template by clicking on the image below:

Pop up Memory Book


Minecraft LEGO Advent Calendar

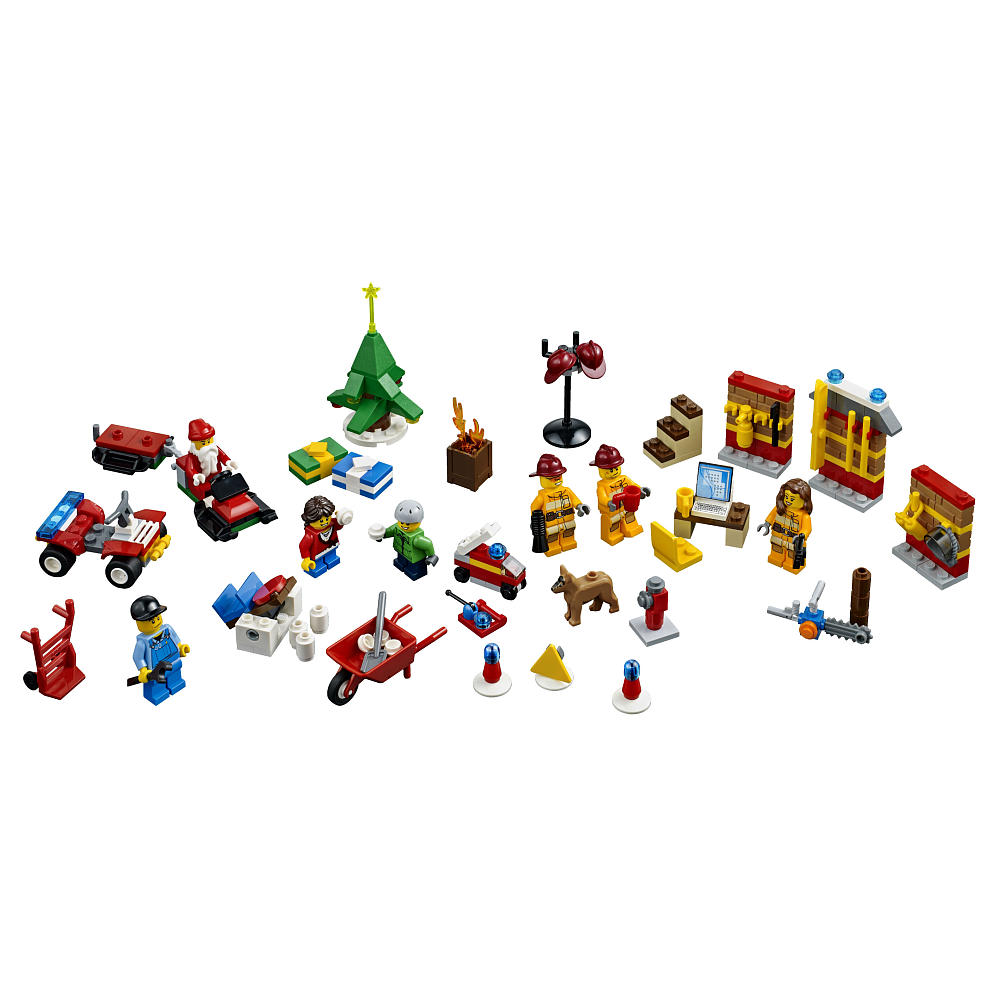
The past few years I have purchased the LEGO City Advent Calendar, which is great fun for kids. Since I only have two kids, they would alternate days opening the calendar. This year we have a tighter budget, so I decided I would make my own Christmas countdown calendar this year - A LEGO Minecraft Advent calender!
 
LEGO Minecraft Advent Calendar
My kids (and probably yours, too!) are obsessed with Minecraft. There is evidence of this all over the house, including on display in the living room:

I figured the least I could do was donate two muffin tins, some LEGOs, and a few hours to create a homemade Minecraft Advent calendar! First, I cut out 3 inch squares out of card stock. Then, I punched circles with the leftover card stock, wrote the numbers on the circles, and glued them on to the squares.

The bulk of time came in designing the LEGO Minecraft miniatures that would fit (in pieces) into the muffin holes. Since my kids are obsessed with the swords and pickaxes, I am going to fill up most of the holes with various combinations (both ones you can build in Minecraft and others that you can't).

For the sword (from top to bottom), I used 4 1x1 bricks, a 1x2 plate with 1 stud, a 1x4 plate, and 2 1x1 cylinders.
For the pickaxe (from top to bottom), I used a 1x2 tile, a 1x4 plate, 2 1x2 plates, and 3 1x1 cylinders.
 
Here are a few of the 20-something swords and pickaxes I put together, along with a furnace my husband made:
LEGO Minecraft Advent Calendar Pieces


That pickaxe on the right has an obsidian handle (black LEGOs) and redstone (red LEGOs) for the axe part. Other colors to use: blue for diamond, yellow for gold, brown for oak, tan for birch, gray for stone/iron. With all the color combinations, you could easily fill your calendar with only swords and pickaxes! It is fun to include some other items, such as the furnace, or blocks (just throw in a bunch of green/brown or gray/black pieces), or a creeper face (shown at the top). I have been photographing each miniature LEGO piece and am going to print them out tomorrow to glue to the back of each red or green card stock square. I will then take apart each LEGO creation and place it into a muffin tin hole, and either hot glue or tape the squares to the muffin tins. Here are some of the blocks I've included:
LEGO Minecraft Advent Calendar Ore
Clockwise from top left: gold, redstone, bedrock, diamond.

Feel free to include traditional Christmas items as well, such as a Christmas tree, a sleigh, presents, a wreath, etc. Here are a few presents:


You can get tons of ideas by looking at the contents of previous years' calendars:

The beauty of this project is that you can use what you have on hand. If you don't have a lot of LEGOs, but have a color printer, search for "printable minecraft block" in Google image search and instead make a Minecraft papercraft calendar! If you do this project, I'd love to see the pieces you've created - feel free to link up your own blog posts in the comments below.