momgineer: montessori
Showing posts with label montessori. Show all posts

FREEBIE Friday: Autumn Math Center!

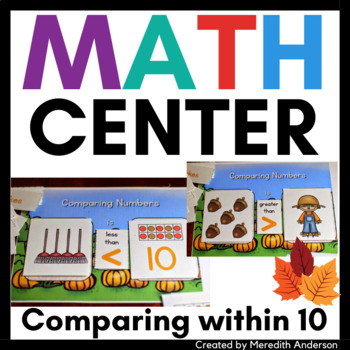
I forgot to post this a few weeks ago, but better late than never, right? I have a fun math freebie to share for your little ones! The provided mat is optional, but you can use it if you are working on greater than, less than, and equal amounts. If not, you can use this as a memory match game or as counting cards.


You can also use the cards with a movable alphabet for K & 1st kids. I highly recommend getting a wooden set if you can, as we use ours all the time, but if it's not in the budget for you, check out these ideas for cheap and DIY movable alphabets.
You can download the file for free here:
http://www.teacherspayteachers.com/Product/Autumn-Math-Center-Pumpkin-Patch-Compare-1525547
Enjoy!

Free math Center for PreK and K kids Comparing numbers to 10 in a pumpkin patch theme. | Meredith Anderson - Momgineer

Geometric Solids - Real Life Connections with a FREEBIE!

Invitation to explore solid geometry (3D shapes):

I included a mix of wooden geometric solids and household objects. Pro-tip: hard to find shapes can often be found in Legos or can be constructed with various magnetic toys!


After placing some of the spheres, my son moved some of the cubes around to keep the spheres in place. It was the perfect time to talk about sliding versus rolling objects!


Cards from my Geometric Solids resource. Or, download the freebie (the only card not included is the hemisphere):

https://www.teacherspayteachers.com/Product/Geometric-Solids-3D-Shapes-Montessori-Cards-FREEBIE-1292208

Reinforcing number sense

Neither of my kids are enthusiastic writers. The 7.5 year old is finally writing with ease, but his almost 6 year old brother is still pretty reluctant about it. Though I do encourage him to write and color, I am always looking for ways he can learn and explore without writing being the focus. We love our Montessori materials, and the beads and wooden number tiles are no exception. I set up this simple station for him with various beads on each tray and then he gathered the number tiles to match the number of beads. After I set up several trays, he then proceeded to set up more on his own, picking beads at random and then figuring out how many there were. This seems to be a task we go back to again and again, though it is quite simple.


We purchased these Montessori materials at Kid Advance, however we have also made our own beads before with pipe cleaners (or chenille stems, if you are fancy like that) and dollar store beads! You could also make ones, tens, and hundreds cards on card stocks. Our trays are also from the dollar store. =)

A few of my other favorite Montessori-inspired activities:


http://momgineer.blogspot.com/2011/03/transferring-activites.html


more challenging transferring activities

I posted about transferring almost two years ago. Recently I decided to set up another transferring task while I was making dinner. While I used to set up this task often, we hadn't done it in awhile, so I tried to think of some more challenging items to transfer. Glass "stones" and marbles? Sure, why not?

F stuck with regular stones from the dollar store.
The wooden apples get used SO OFTEN here! Incredibly versatile!
Marble transfer.
Pennies! Now that's a challenge!

This gave me 20+ minutes of silence. I got to prep dinner, they got fine motor skill practice. We all won!

noun sorting

We have been talking about nouns for a few days and so I searched for some person, place, and thing printables to make a sorting game.

Two sets good for pre-readers are here and here; there are both pictures and words on the cards (I printed 4 sheets per page since there are so many pages).

Montessori for Everyone has a great printable with words only, excellent for those kids that have already started reading. They are also grouped so that the person, place, and thing all relate to each other (astronaut, outer space, space shuttle).

Print these out on card stock and let the sorting begin!


cornmeal lettering


Blogger had a bit of a hiccup the other day and lost this post so I'll do my best at reposting what I'd written. We have been very busy this spring and spending much time outside, so although I have a lot of posts half-written, I haven't had longer chunks of time to sit down and finish them. 

This activity arose after glancing through a Montessori Services catalog and seeing this cute tray. I knew H&F would like to try it out so I put a cornmeal lettering activity together for them.

What you need:
  • Tray (I used the tops of cookie tins)
  • Cornmeal or sand
  • Letter cards, a letter chart, or sandpaper letters (which you can make; ours were purchased through Kid Advance)
  • A small scoop/measuring cup
Have them trace the letter first on the sandpaper or letter card, and then make it again in the cornmeal.

The materials.
Older kids can swish, but we used a small scooper to smooth out the cornmeal.
While trying it out, I found that less cornmeal is actually better.
H tries it out.
We used both lower- and uppercase letters.
F gave it a try, but just liked scribbling in it as well.

sorting seasons by clothing

Montessori for Everyone has a cute printable file for sorting seasons by which clothing is worn. I don't have a laminator but if you do, I'd recommend printing the file on card stock and laminating these. I took the poor woman's version and printed on regular paper, glued to heavy weight paper, and laminated with clear contact paper before cutting them out. We then set up the activity on a woven placemat. As it turns out, some of the cards aren't quite as obvious so it can be solved a couple different ways that are still correct, even with five pieces of clothing for each season. I will probably also print the outdoor season cards as well to mix in with these.
Printed, glued, and covered with clear contact paper.
Cut out.
Season cards placed for sorting.
Trickier than expected, but fun.

scent matching

This is a fun game for rainy days, and the scents can easily be discarded and replaced as often as you'd like, so you can keep changing it up for variation.

What you need:
  • empty and clean bottles (matching)
  • cotton balls
  • scents (anything from herbs or vinegar to perfumes)
  • small pitcher and funnel (optional)
Gather your bottles.
Choose some scents; you will need to make two of each.
Add the scents and a cotton ball and put the lids on.
The kids helped me choose the scents and add them with some water to the bottle. They added a bit more water (with the small pitcher and funnel) than I would have but they worked fine for the game. Just soaking the cotton ball with some scent and water should be enough, though, and less chance for spills.

All you have to do now is play. Choose two bottles at a time to try and match the scents. If you are using herbs, you might have to use more opaque bottles (or use all herbs so that you can't just tell by looking at them). Ideally you will have a lot of scents to choose from; you can discuss the nature of the scents as you play and have your child try to describe them.

Simple Transferring Activites for Kids

Practice Fine Motor Skills with Transferring Activities

This is a favorite busy activity for younger kids. I suggest varying the objects that are getting transferred to keep this task interesting. It is a great fine-motor activity, and a calming one that can help bring focus as well as develop hand coordination and strength for writing. It doesn't generally hold interest for very long, but can help transition from a hectic atmosphere to a more peaceful one.


Materials needed:
  • Tweezers (like these for perler beads, cheaper at Michaels) or learning chopsticks
  • Ice cube trays, egg cartons, or other compartmentalized tray
  • Transferring objects:
    • pompoms (easy)
    • cut up sponges (easy)
    • miniature animals (medium)
    • wooden cubes (medium)
    • perler beads (difficult)
    • marbles (difficult)
    • anything else you can think of - perhaps items from a nature walk
Transfer randomly, or ask your child to try creating a pattern. You could also use color resemblance sorting cubes for this task to make it even more challenging. My big kid decided to make up a pattern (below), while the little one just focused on getting the objects into the ice cube tray. For younger children, try using larger objects, like smooth decorative stones, and have them grasp them with their hands to help develop a tripod grip.

2. Transfer!
 He did the same pattern in each row, reversed.

I hope your kiddos enjoy this activity! Sort on!

napkin rolling and folding

Napkin folding and rolling are practical life activities that can become part of your child's a daily meal routine. You don't need fancy napkins or napkin rings. You can make your own napkin rings by cutting toilet paper or paper towel tubes and decorating them with ribbon or fabric. If you use paper napkins, you can still roll them, but you can pick up cloth napkins fairly inexpensively and wash them along with your laundry. It is nice to have larger diameter rings for younger children, like the red ones below:


It doesn't have to be perfect!
This is a holiday set. No, I don't iron my cloth napkins. =)
rocking the Pfaltzgraff
If you don't want to roll, or don't have rings, the folding task is also useful to learn. H generally folds all of our washcloths and small towels now when I'm doing laundry, which is helpful for me and fun for him.  Traditional Montessori folding is shown here and described in impressive detail here. Folding in quarters works for us, so that is what we do! You can try experimenting with fancy napkin folding, too!

mystery bag game

This is a great activity to help your child learn about adjectives, and one found in Montessori learning, though typically with two sets of geometric solids. You can describe what you are looking for with words such as smooth, bumpy, round, rough, soft, heavy, light, small, large, squishy, and so on.

1. Find 2 each of geometric shapes, miniature animals, pompoms, straws, etc.
Why yes, those are homemade tree blocks on the left! Future post, I promise!
2. Put one of each in an opaque bag (you may want one with a drawstring if you a peeker).

3. Describe one of the animals outside the bag. Ask your child to find it. Then ask your child to find it in the bag, without looking.

A few variations on this game:
  • Put *all* the items in the bag. Pull out one first, then try to find its mate. 
  • For younger children, you might want to just use similar (and fewer) items; for example: two balls, two animals, two blocks, two beanbags.
  • If you have more than one child, have them sit back to back. Have one child pull out an item and describe it, pass the bag to the next child and have them try to figure out what it is and find the match.
This could make a good car/travel game as well if you include a bag for matches as well.

DIY Color Resemblance Sorting Cubes

DIY Color Resemblance Sorting Cubes


We have a number of Montessori materials at home that we use, but their cost limits the number of items we have. Sometimes it's possible to use the basic idea and make your own substitute. Kid Advance (where I've gotten the bulk of our Montessori items) has a Color Resemblance Sorting Task that looked really cute but $50 for a task that could become boring quickly didn't seem like a good use of money. I thought that using cubes to do a similar task would be fun and also keep with the sensorial nature.


We frequently head to Michaels, 40% off coupon in hand, for art/craft supplies, so on one trip there I looked for and found 3/4" wooden cubes that I thought would work well. Here they are:


Materials Needed to create your own color cubes:

  • wooden cubes (or another shape you like)
  • craft paint; you will want white as well as a few colors
  • paint or foam brush
  • mixing palate/tray
You will have to paint the cubes twice since the first time you will only be able to paint 5 sides, so make sure you have time to let them dry enough that you can paint the last side while you still have all your colors mixed. You can use as many shades of a color as you'd like by mixing in different amounts of white paint. Don't worry if they aren't perfect; most kids will beam with pride over something they've created rather than dwell on slight imperfections. I suggest adding the paint colors yourself and then letting your child mix the paint together and paint the cubes one at a time. You will want to make sure the coat is fairly even and not too thick. If it's too thick you won't be able to do fun things like stack them:


You can also make silly mosaics or build towers or whatever else you'd like to do with these sweet little blocks.


Another great way to use these is for measuring. Ask your child to pick out different toys or books they would like to measure and then figure out how many blocks tall (or wide/long) the different items are. It's a great way to explore non-standard measurement, and then compare using a ruler or tape measure.

Pin this idea for later:
Create your own color resemblance sorting cubes with wooden blocks. | Meredith Anderson - Momgineer