momgineer: economical
Showing posts with label economical. Show all posts

How to Make Homemade Scratch Art Paper in 3 Easy Steps

Easy DIY Scratch Art Paper 

Scratch art paper is fun to use, but I think it might even be more fun to make! My kids gave this project two thumbs up.

Gather Materials for your Scratch Art Paper


  • card stock
  • crayons
  • black tempera paint
  • dish soap
  • paint brushes, foam brushes, or sponges   
  • bamboo skewers or wooden scratch sticks from a scratch art set

Start Coloring!

Cut the card stock in half or even quarters if you want the sheets to be more manageable. Use the crayons to color the entire page. It's particularly fun to use all the colors of the rainbow!

Scratch Art Paper Step 1: Color a good amount of the card stock!

Mix it Up

Use a 50/50 mixture of black tempera paint and dish detergent and paint over the colors (a foam brush works well).
Scratch Art Paper Step 2: Paint over your colors

Create Your Scratch Art Designs

After the paint has dried, it's time to scratch off the black layer! This is the fun part!


Pin this post to easily come back to it later!

DIY scratch art paper in 3 easy steps! | Meredith Anderson - Momgineer

Save Money on Teachers pay Teachers with These 3 Tips

Make a Wish

What do you wish you had more of? If you are a teacher or homeschool parent, I'd be surprised if time or money isn't on your wish list. What if I told you there was a way to have more time for yourself without spending all your money?


Save Time with TpT

High-quality resources from Teachers pay Teachers don't just support your students, they support you. Take the time out of planning by using a resource we have already tested out and compiled for you! Use that extra time to do whatever your passion is or take some self-care time.

I Love TpT but my Wallet is Sad!


Maybe you already spent all your money on Flair Pens this month, or took one too many trips to the Target Dollar Spot (welcome to the club, by the way).

I'm guessing you are already aware of how much time teacher created resources can save you. The expenses can start to add up, though, particularly if you are in need of year-long bundles or are teaching multiple grades. Here's the good news: you can save some of that money! It's as easy as 1-2-3!

1. Follow Your Favorites

Follow on Social Media and on TpT

Make sure you are following your favorite stores on Facebook, Instagram, and Twitter so you are aware of special discounts and sales. Other ways to keep tabs on your favorite teacher authors? Follow them on TpT (click on the green star or  "Follow" at the top of the store page) and subscribe to their newsletter! I love to send out surprise freebies to my subscribers. It's my favorite way to thank your for being an awesome follower and supporter.

2. Earn Free Credits by Leaving Feedback

Earn Free Credits by Leaving Feedback
Go grab a Benjamin right now and flush it down the toilet. Who am I kidding? Let's face it, you are probably fresh out of Benjamins. So grab a good old Lincoln and flush that instead.


If you aren't already doing this, it's the same thing as flushing poor Abe. After you make a purchase on TpT, go to "Buy" --> "My Purchases" and sort by "Needs Feedback." Click on "Provide Feedback" and then write a short statement about the resource. If you want to be really helpful, provide the grade level you used it for, the most useful part of the resource, and anything else you loved about it. Was it easy to use? Did your kids work independently and happily on the activity? Include that! We love to hear it and you will be helping out others who might be interested.

Have a problem with the resource or find an error? We want to hear about that too! To make sure the store owner reads that right away (and hopefully fixes any possible errors), click on Q&A and write a short note about any issue you might have. Unfortunately, we all make mistakes now and then, but I promise we are also willing to fix them!

3. Claim a Tax Deduction

Don't Throw Away Those Deductions!

Disclaimer: I am not an accountant. Please check with your own accountant to verify you can do this. Some of your educator expenses may be tax deductible! Here is a great article from TurboTax about how this might apply to you. Pro tip: save all your receipts! On TpT, it's easy to find and print your receipts. Go to "Account" --> "My Account" and then click on the Annual Purchase Statement.

Again, Those 3 Tips are:

  • Follow your favorite sellers
  • Use your credits
  • Take your tax benefits

Pin It! 

Share this on Pinterest or Facebook so your friends can save money, too!

SIX ways to shop smarter on Teachers pay Teachers - Follow these tips to keep more money in your pocket while shopping for high quality classroom resources! | Meredith Anderson - Momgineer

Get 3 MORE Tips

Say what? Save even more by heading over to Brittany Washburn's post for tips 4-6!

https://l.facebook.com/l.php?u=http%3A%2F%2Fbrittanywashburn.blogspot.com%2F2017%2F04%2Fsave-money-on-teachers-pay-teachers.html&h=ATPN12ch6MLNn36E6eA4MS21SWoEi8hqIYEHIsEkwt5j8hWqTtbWdiObzgTzbxW-Q2u3g2s88YrgYc88WjHSmbuLat5_IYOPX19XpHsKh_cPeYuhwPG__jmN5b3Igg


STEM Activity - Cantilever beam challenge!

Beam STEM Activity for Kids


Explore cross sections, design a beam, and then test the design for strength with a cantilever beam challenge. Here is a snapshot of what this activity looks like:


Engineers need to pick the best design for the application. Different cross sections provide different benefits. Some look like they would be strong, but during testing you will find out which design works best. Wall thickness also plays a part!

Get Started with the STEM Challenge

Try using cardboard tubes and boxes and come up with as many designs as you can. Things to consider and questions to ask:
  • How long is the beam?
  • How thick should the material be?
  • Would another material work better?
  • Where does the beam fail?
  • Where have you seen a cantilever beam in real life?
  • Which are the weakest and strongest beams? 
  • How much stronger is the strongest beam than the weakest one?
  • What could you change to make the strongest beam even stronger?
While you can set this up from the images and questions above, I hope you will visit this STEM challenge activity pack:

https://www.teacherspayteachers.com/Product/STEM-Activities-10-STEM-Challenges-1560993

There are more details for this challenge, including relevant vocabulary, as well as 9 other STEM challenges you can do with your students!

Minecraft LEGO Advent Calendar

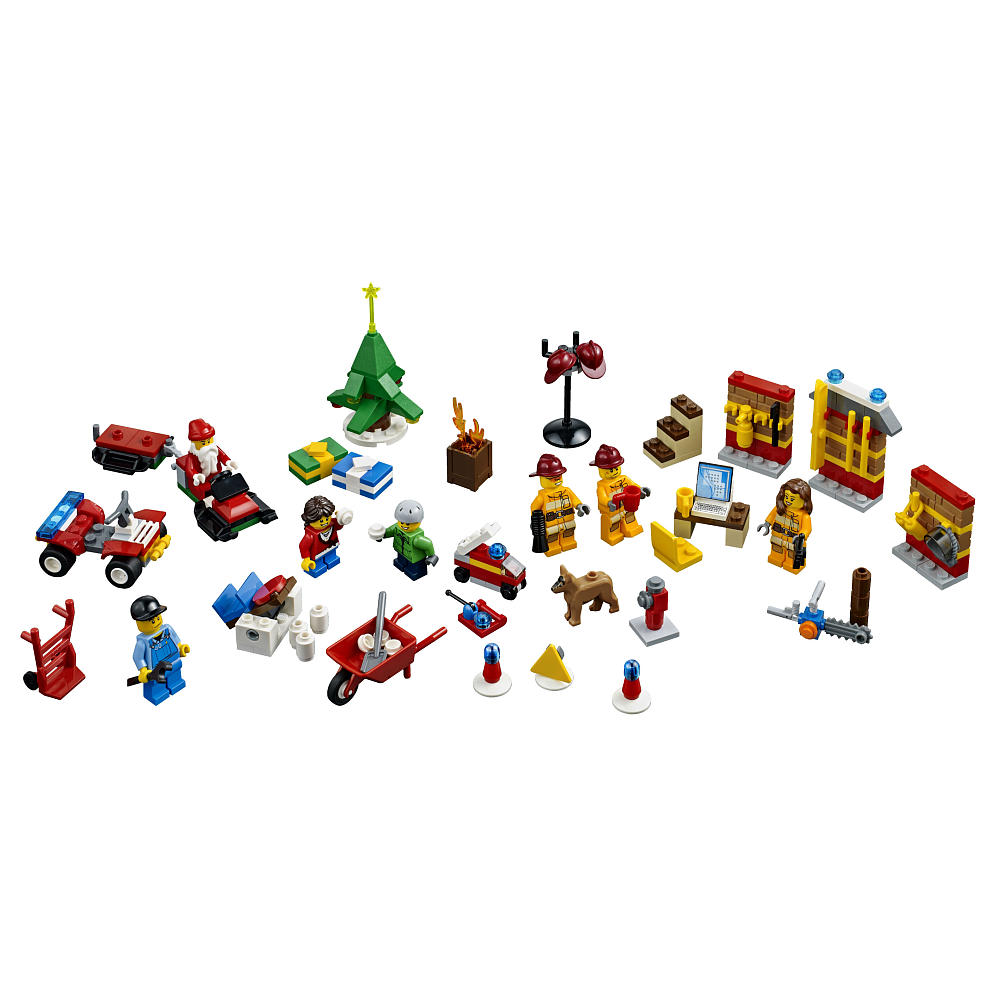
The past few years I have purchased the LEGO City Advent Calendar, which is great fun for kids. Since I only have two kids, they would alternate days opening the calendar. This year we have a tighter budget, so I decided I would make my own Christmas countdown calendar this year - A LEGO Minecraft Advent calender!
 
LEGO Minecraft Advent Calendar
My kids (and probably yours, too!) are obsessed with Minecraft. There is evidence of this all over the house, including on display in the living room:

I figured the least I could do was donate two muffin tins, some LEGOs, and a few hours to create a homemade Minecraft Advent calendar! First, I cut out 3 inch squares out of card stock. Then, I punched circles with the leftover card stock, wrote the numbers on the circles, and glued them on to the squares.

The bulk of time came in designing the LEGO Minecraft miniatures that would fit (in pieces) into the muffin holes. Since my kids are obsessed with the swords and pickaxes, I am going to fill up most of the holes with various combinations (both ones you can build in Minecraft and others that you can't).

For the sword (from top to bottom), I used 4 1x1 bricks, a 1x2 plate with 1 stud, a 1x4 plate, and 2 1x1 cylinders.
For the pickaxe (from top to bottom), I used a 1x2 tile, a 1x4 plate, 2 1x2 plates, and 3 1x1 cylinders.
 
Here are a few of the 20-something swords and pickaxes I put together, along with a furnace my husband made:
LEGO Minecraft Advent Calendar Pieces


That pickaxe on the right has an obsidian handle (black LEGOs) and redstone (red LEGOs) for the axe part. Other colors to use: blue for diamond, yellow for gold, brown for oak, tan for birch, gray for stone/iron. With all the color combinations, you could easily fill your calendar with only swords and pickaxes! It is fun to include some other items, such as the furnace, or blocks (just throw in a bunch of green/brown or gray/black pieces), or a creeper face (shown at the top). I have been photographing each miniature LEGO piece and am going to print them out tomorrow to glue to the back of each red or green card stock square. I will then take apart each LEGO creation and place it into a muffin tin hole, and either hot glue or tape the squares to the muffin tins. Here are some of the blocks I've included:
LEGO Minecraft Advent Calendar Ore
Clockwise from top left: gold, redstone, bedrock, diamond.

Feel free to include traditional Christmas items as well, such as a Christmas tree, a sleigh, presents, a wreath, etc. Here are a few presents:


You can get tons of ideas by looking at the contents of previous years' calendars:

The beauty of this project is that you can use what you have on hand. If you don't have a lot of LEGOs, but have a color printer, search for "printable minecraft block" in Google image search and instead make a Minecraft papercraft calendar! If you do this project, I'd love to see the pieces you've created - feel free to link up your own blog posts in the comments below.


coffee filter flowers

I know this isn't new, and it's something many others have done way more beautifully than we have, but it is a fun craft for Mother's Day!

Yay flowers!
 What you need:
  • Coffee filters
  • Dye (we used Neon Colors in water-filled ice cube trays and dripped them on with medicine droppers)
  • Chenille stems, pipe cleaners, whatever you call them
Materials Needed
These dry really fast!
Once dry, put two or more in a stack and then pinch the bottom and add a stem.
They also make beautiful butterflies!


suncatchers via the artful parent

We recently tried out this easy activity after I saw is posted by Jean over at The Artful Parent. I already had beads (from Dollar Tree). I took the advice from the comments and cooked these outside on the grill. No outgassing in the house was a huge bonus!

One of the finished suncatchers.
We used mixed opaque and translucent beads.
H placing his beads into the muffin tray.
Grill ready to go!
Rainbow suncatcher!

Suncatchers!

Chocolate or Candy LEGO Valentine's Day Treats

Yummy Homemade LEGO Valentine's Day Treats

Make your own delicious and adorable LEGO Valentine's Day Treats! | Meredith Anderson - Momgineer


One of my kids detests chocolate. Though I know chocolate is a traditional Valentine's Day treat, I decided we would make white chocolate treats this year. Since both my kids love LEGOs, and I already had a minifigure mold from a LEGO-themed birthday party, this Valentine card seemed like a no-brainer!


Make Your Own LEGO Valentine's Treats

Please note: I may earn a small commission for my endorsement, recommendation, testimonial, and/or link to any products or services from this website. Your purchase helps support my work in bringing you downloads of value and information about educational resources. The link below is an Amazon affiliate link. You can read my full disclosure here.

What you need:
  • LEGO figure mold (I used the LEGO Minifigure Ice Cube Tray (aff link)
  • scissors, string, single hole punch, 2.5" hole punch (or you can cut out the circles)
  • chocolate, white chocolate, or candy melts
  • small bags to put the finished product in
  • template (below, or download the pdf, or feel free to make your own!) - these would also be cute cupcake toppers!
Template: background graphics from www.mycutegraphics.com
Melt white chocolates in the microwave in a glass bowl/measuring cup, an pour into the mold.

After the minifigs cool (you can refrigerate to speed up the process), gather your supplies.

Punch out the circles and then punch two small holes in each circle.
Loop the string through the holes and tie to secure the LEGO minifigure.
Sign the back, place in a poly bag. Done!

easy beaded ornaments

We are on a crafting kick this holiday season! Usually my boys' interest isn't held by crafts, but maybe they have just finally reached the right developmental period to work on them. They have been requesting to make more and more ornaments so I thought I'd share another easy-peasy and very inexpensive ornament craft. Make and Takes shows several other shapes we didn't do; we just focused on wreaths and candy canes.

What you need (all hopefully should be found at your local dollar store!):
  • chenille stems
  • beads (I got some clear heart beads as well - they look *great* near Christmas lights!)
The wreaths.
I also got these trays at our local dollar store - great for crafting or building LEGOs on!
I added a chenille stem for a hook, but regular ornament hooks work fine, too.
So easy and satisfying! Hopefully I will be able to share a few more Christmas crafts we've been doing.