momgineer: sensory
Showing posts with label sensory. Show all posts

How to Use Fidget Spinners for a STEM Challenge

Fidget Spinners Driving you Crazy?

The whir might have faded to background noise to you at this point, or maybe you can't get it out of your head. Before you ban fidget spinners completely, why not put a spin on the fidget fad and engage your students in a STEM challenge?

Disclaimer: I may earn a small commission for my endorsement, recommendation, testimonial, and/or link to any products or services from this website. Your purchase helps support my work in bringing you downloads of value and information about educational resources. The link below is an Amazon affiliate link. You can read my full disclosure here.

Fidget Spinner STEM Challenge

Turn that Obsession into a Learning Opportunity

How to Use Fidget Spinners for a STEM Challenge. Learn the science first, then follow the engineering design process. Use math to analyze and improve the design! | Meredith Anderson - Momgineer

Start off by learning the science of rotational motion. I have provided informational text about inertia, angular velocity, torque, and more so that students first get an understanding of the spinners from a scientific perspective. This is reinforced with hands-on experiments and demonstrations, such as noting how the center of mass will change based on where weights are placed on an object.

Follow the Engineering Design Process

How to Use Fidget Spinners for a STEM Challenge. Learn the science first, then follow the engineering design process. Use math to analyze and improve the design! | Meredith Anderson - Momgineer
The engineering design process (EDP) is the method engineers use to solve problems. It has some similarities to the Scientific Method so if you haven't used the EDP before, read through the steps:

ASK - What is the problem? Has it been solved before?

IMAGINE - Some solutions to the problem. How large will your spinner be? How many arms will it have? What materials are available to use? Do you have design constraints?

PLAN - Sketch your design and label it.

CREATE - Build the design and then test it. How long does it spin? Does it fit comfortably in the hand to spin it? Is it assembled well and symmetric? Record and analyze the data.

IMPROVE - Can you make it spin more smoothly or for longer? What might be causing friction?

SHARE & REFLECT - Share your design with someone else. What do they think of it? Could their feedback help you improve the spinner even more?

Math Extension Activity 

How to Use Fidget Spinners for a STEM Challenge. Learn the science first, then follow the engineering design process. Use math to analyze and improve the design! | Meredith Anderson - Momgineer

How much would it cost to make 1000 spinners? Students create a Bill of Materials (BOM), calculate the cost to assemble the spinner, and find the volume to calculate the cost of the packaging. Why is this important? Engineers need to be mindful of costs when creating a new product. What if the cost of the raw material goes up? How can you cut costs in a different way. Packaging design is a whole branch of engineering - think about all the different packages you encounter in goods you purchase. An engineer was involved in the design of that package, cost was a very important factor in the package design.

Get Creative with Marketing and Graphic Design

How to Use Fidget Spinners for a STEM Challenge. Learn the science first, then follow the engineering design process. Use math to analyze and improve the design! | Meredith Anderson - Momgineer
Students need to think about who might buy their spinner and then create a marketing campaign to hook potential buyers! They can also create a fun design on a traditional spinner to catch a shopper's eye. Why is this step important? You can have the best product in the world, but if nobody knows about it, it won't sell and ultimately will fail in the market.

Why STEM?

How to Use Fidget Spinners for a STEM Challenge. Learn the science first, then follow the engineering design process. Use math to analyze and improve the design! | Meredith Anderson - Momgineer
Not only do students work in small teams, which helps foster community and teamwork, but they also learn to fail and embrace a growth mindset. You will see amazing problem-solving and creative thinking with this project. Students use higher-order thinking skills in their STEM projects, and they can use those skills in other academic areas as well. Because there are so many possible solutions to this problem, there are many avenues to success. You may even inspire a student to come up with a new and unique spinner that is better than commercially available ones!

Find it on TpT 

The full resource can be found on Teachers pay Teachers. It includes everything shown here and more. There are samples, teacher notes, and planning pages to help you make this a successful challenge in your classroom or at home. If you are looking for some tips and tricks to try this on your own, though, read on for a video.

https://www.teacherspayteachers.com/Product/Fidget-Spinner-STEM-Challenge-Follow-the-Engineering-Design-Process-3141202?utm_source=Momgineer%20Blog&utm_campaign=Fidget%20Spinner%20

Easy Shopping Links

Amazon affiliate links:
Neodymium Magnets or here
Skate Bearings
Gorilla Tape 
Tin of Marbles or here

Watch the Video to Learn More 

Get an overview of the challenge and some DIY tips on YouTube!

Holiday Freebie & Teaching Tip Series: Day 7

The last day of the holiday freebies and teaching tips is here! I have a freebie up that I know will challenge your 3rd and 4th graders!

http://www.teacherspayteachers.com/Product/Find-the-Yule-Rule-Holiday-Math-Fun-FREEBIE-943547

Here is a winter activity my kids love:

http://www.teacherspayteachers.com/Store/Meredith-Anderson

If you are feeling adventurous and live in a cold climate, bring some real snow inside!


This is a few years ago, but we do this every year. Sometimes it's just too cold to go outside! Gloves are recommended. =)

Add snow cones to make this a real treat! Use syrup or flavored drink mix, or mix lemon juice with sugar for lemon flavored snow cones. Happy holidays! =)

Coin Rubbing Money Tree

Coin Rubbing Money Tree - A Hands-on Money Activity


This is a fun way to explore coins in a hands-on way. My kids love anything to do with money: counting money, playing with money, experiments with money, and so on! This is a great way to reinforce coin size, as well as coin recognition as the patterns are rubbed through with crayon. This is LOW prep and can be done whenever you want to introduce, practice, or review coins.


What you need:
  • coins (if you have any foreign or unusual coins, this makes it even more fun!)
  • crayons, without their wrapping
  • a bare tree. Paint or draw one yourself, or print out the image below (click to view larger):


For a challenge, have your child add up how much their money tree is worth, or see how many of the state quarters they can identify:

Some of the state quarters make really nice rubbings!


Coin rubbing money tree. Print a tree, place coins under the paper, and rub with crayons. | Meredith Anderson - Momgineer
 
Looking for more Money activities? Learning is so much more fun when you use games, so I have created several games and activities to actively engage students in money:

Money Games and Activities
 
More money activities:

Fishing for money at an indoor carnival

Pin this idea for later:
Coin rubbing money tree. Print a tree, place coins under the paper, and rub with crayons. | Meredith Anderson - Momgineer


pompom racing

What you need:
  • pompoms
  • straws
  • ramp (optional) - a table or smooth floor works well too
This is something my kids have loved doing for years. I got this activity ready for them this morning since we hadn't done it in awhile. It is always a HUGE hit here! This is one of many great games we learned from a speech therapist.

Pompoms set up.
Ready, set, blow!
They fly down the ramp so fast it's hard to capture it!


quick light box

I have always liked the light table at our local children's museum. Due to several recent posts exploring light at Play At Home Mom, I have really been coveting a light table. While I would love to have one, I can't justify the cost without knowing how much use it would get. For our purposes at this point in time, I decided to make a quick test model just to see how long a light table would hold interest.

Playing with color.
What you need:
  • Bin or box with a translucent lid
  • Aluminum foil
  • LED flashlights (regular, if that's all you have!) or holiday lights (a resourceful mom I know used these!)
  • Objects that allow light through!
    • marbles
    • stones
    • tissue paper
    • magna tiles(if you have them)
    • clear plastic bottle (optional) 
    • x-rays

Line your box with aluminum foil. Turn on all the flashlights. Put the lid on.
What it looks like inside.
Turning the flashlights on end so they point toward the lid works well, but was too difficult to see in photos.
Voila! Two minute light table!
It's not perfect, but it definitely served its purpose. I will probably use a larger bin next time, but everything else worked well enough to do again. The tissue paper was great for making colors!

hot day water play

We have been having a heat wave in the northeast, so have been spending a lot of time in and around water to cool down. While the water table is always a favorite, I thought I'd share some ideas to make it even more fun. Ideas of things to add:
  • Turkey basters or eyedroppers
  • Measuring cups
  • Empty bottles
  • Pop tubes - we like to extend and connect them
  • Squirting toys

funnels 
turkey baster, funnel, pop tubes
 Hosing off the deck.
Figuring out how many cups fill the bottle.

weaving practice

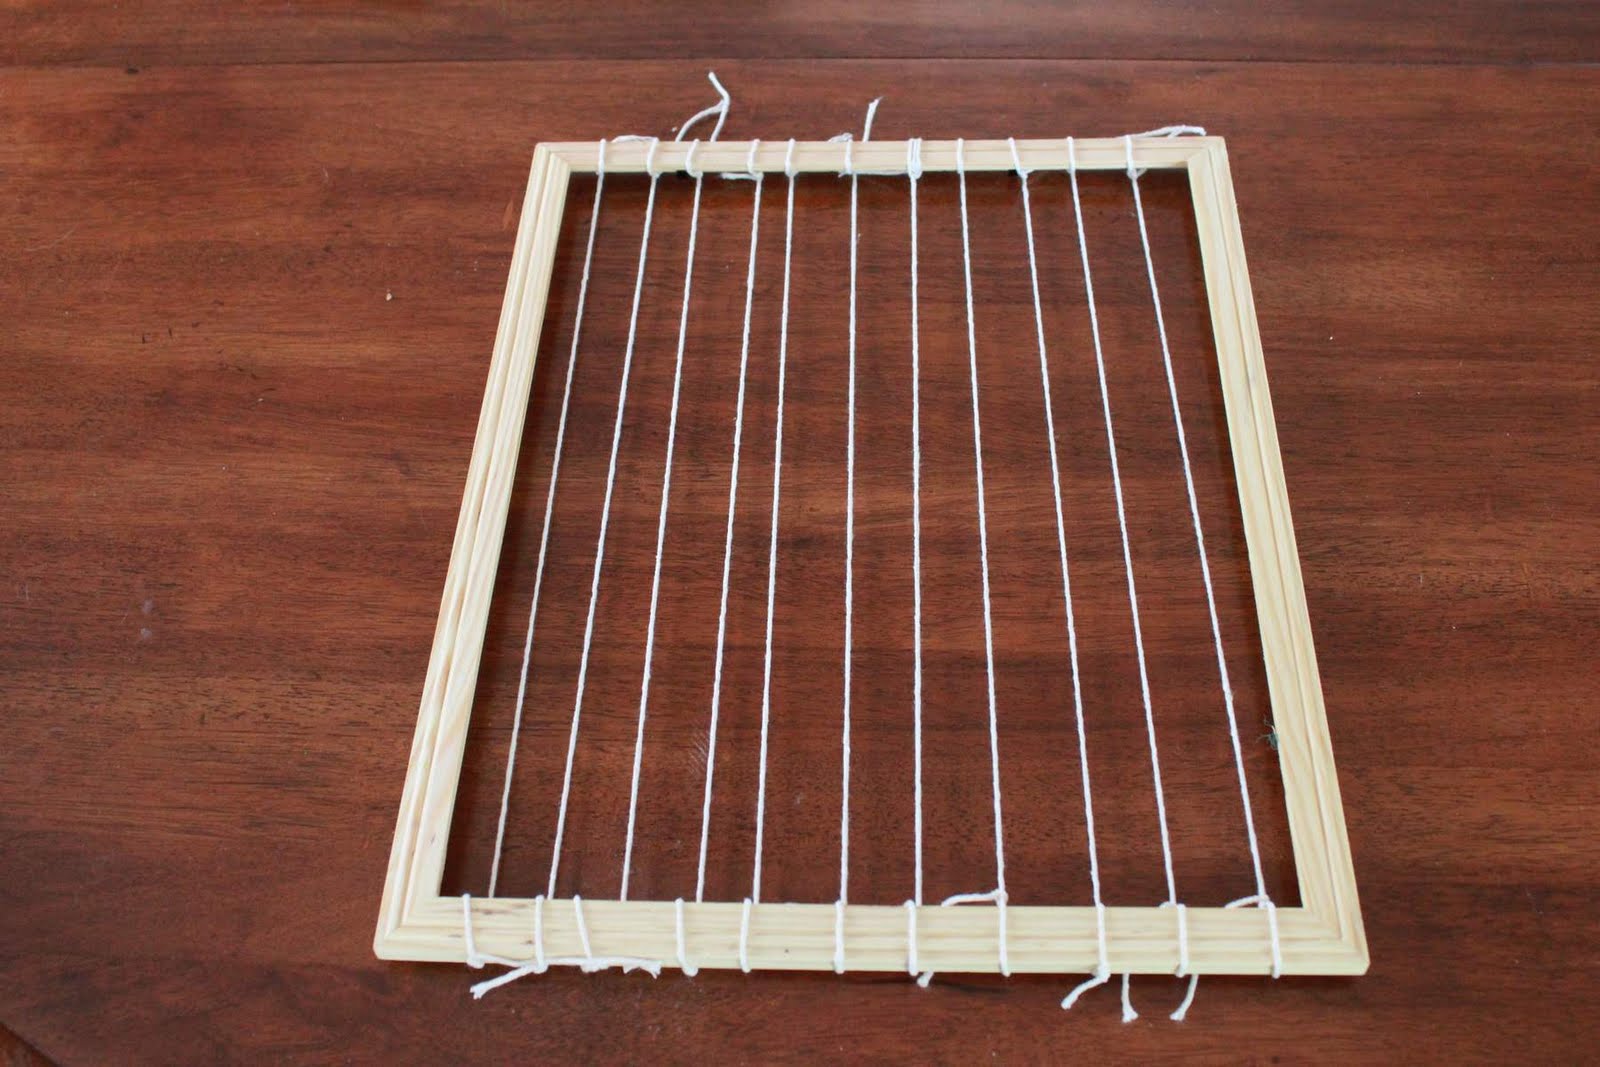
This was an inexpensive and fast (<15 minutes to set up) project that I got the idea for after visiting a children's museum that had something similar.


What you need: 
  • Frame (mine was $1 at the local dollar store)
  • String
  • Scissors
  • Fabric, ribbon, shoelaces, etc. Different textures are nice. I threw some hook and loop in there too.
The frame I started with. I just took out the glass and paper.
Add some strings. I will probably add more to make it more challenging in the future.
Materials for weaving. Cut the fabric to different widths.
H weaves.
Done!
It might be fun to have different colored fabric scraps around for different holidays, or to make a rainbow, or enough of the same kinds to do patterns. After some practice we might move on to a real weaving frame, but this is fun in the meantime. Apparently it is even more fun to pull all of the ribbons out after the project is complete!

rock hunt

This is one of our favorite outdoor activities. H&F don't like going on walks without a purpose, and although I'd love to just walk for the sake of walking, giving them a task to focus on while we're walking seems to help them enjoy the walk quite a bit more than they would otherwise.

What you need:
  • basket or beach pail 
  • a safe place to walk (I also like to bring the wagon, in case pails get too heavy or little feet get too tired!)
That's it!

We like to save our rocks and bring them inside, weigh them, wash them in a basin and then build with them, sort them by size, or paint them.

Rock hunting in the neighborhood!
Weighing in.
Rinsing and scrubbing. Good skills to master!
F paints. We added stick on googly eyes after they dried.
H paints! You can also warm the rocks in the oven and use crayons to color them.
Loot from a previous rock hunt. Great for sorting.
We picked up a few more rocks at a local park recently. Some great finds!
I may have to find a few more good sized, flat rocks. After seeing these on pinterest, I really want some for my garden!
How cute are these?!

cornmeal lettering


Blogger had a bit of a hiccup the other day and lost this post so I'll do my best at reposting what I'd written. We have been very busy this spring and spending much time outside, so although I have a lot of posts half-written, I haven't had longer chunks of time to sit down and finish them. 

This activity arose after glancing through a Montessori Services catalog and seeing this cute tray. I knew H&F would like to try it out so I put a cornmeal lettering activity together for them.

What you need:
  • Tray (I used the tops of cookie tins)
  • Cornmeal or sand
  • Letter cards, a letter chart, or sandpaper letters (which you can make; ours were purchased through Kid Advance)
  • A small scoop/measuring cup
Have them trace the letter first on the sandpaper or letter card, and then make it again in the cornmeal.

The materials.
Older kids can swish, but we used a small scooper to smooth out the cornmeal.
While trying it out, I found that less cornmeal is actually better.
H tries it out.
We used both lower- and uppercase letters.
F gave it a try, but just liked scribbling in it as well.

Art of Roughhousing Event

There is an Art of Roughhousing event this coming weekend in the greater Boston area, for those who are interested. We attended a workshop in March that was great fun! We have a very busy weekend this weekend so unfortunately I am not able to attend but I wanted to pass it on. Here are the general details:


On Sunday, May 22, the Boston Parents Paper and Solomon Schechter Day School of Greater Boston will host Larry Cohen, Ph.D., at a special multi-media presentation about roughhousing. Cohen is the co-author of the new book Roughhousing: Good Old Fashioned Horseplay and Why Every Kid Needs It (Quirk Book, 2011; $14.95). He'll talk about why roughhousing is good for parents and kids and he'll show you some cool roughhousing moves you can try at home.


Sunday, May 22, 7-9pm, Solomon Schechter Day School of Greater Boston, 60 Stein Circle, Newton, MA. Refreshments served; books available for sale. Tickets: $12 at the door; reservations suggested but not required. Call 617-522-1515; ext. 278.