momgineer: stop motion animation
Showing posts with label stop motion animation. Show all posts

Create Digital Stop Motion Animation

 Digital Stop Motion Animation

Hands-on stop motion animation is one of my favorite STEM activities to do with kids, because it can be tied into almost any subject area, offers high engagement, and develops patience, perseverance, and persistence. It's not always an option, though, such as when:

  • Technology or materials are limited
  • You don't have space to set up and keep sets available for multiple sessions (such as if you are teaching froma cart)
  • Or in the case of no-sharing materials, hybrid or remote learning, you may not be able to do hands-on projects.
  • Your kids are working on stop motion activities as a bonus or choice activity when they may only have 10-15 minutes at a time to devote to it.

This is the perfect time to use digital stop motion animation instead!

Simple Digital Stop Motion Animation

A simple way to get started animating quickly is to use ABCYa Animate - backgrounds, characters (called stickers), and drawing tools are all built in. You can simply just jump right in and start animating!

Some of the kids on my robotics team made a stop motion animation video with ABCYa (and then did some extra edits in OpenShot). You can see the video here:


Animating with Google Slides

Almost as easy as ABCYa is to just use Google Slides. I'm not going to reinvent the wheel with a tutorial video because there are dozens of them on YouTube already (I linked some below), but here are the basics:

  1. Start with a background
  2. Add in your animated component(s) as needed
  3. Duplicate the slide
  4. Move your animated component(s) ONE ARROW keystroke in any direction (if animating text add one letter per slide)
  5. Repeat steps 3 and 4 until your animation is complete.
  6. Watch your stop motion animation video as directed in the tutorial videos and/or screen capture the video and add some cool post-edits, like music, sound, credits, etc. I like to use Shotcut or OpenShot for this.

Stop Motion with Google Slides Tutorials


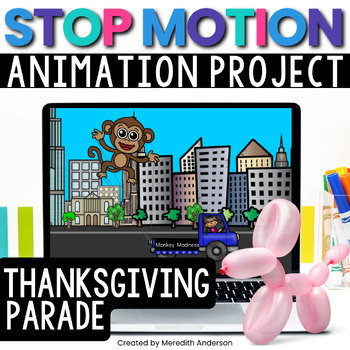
Balloons Over Broadway or Thanksgiving Day Parade Stop Motion Animation

This idea came to me as a way to tie in a digital STEM activity to the read aloud Balloons Over Broadway by Melissa Sweet. Students can create their very own Thanksgiving Day Parade with floats they find on Google image search, or they can draw their own with the drawing tool. Here is a video sample of a completed project:


Why I love this project:
  • Students can work in pairs, but they could also work alone to create a single animation or a complete parade of floats!
  • Kids who struggle with drawing can use a float already found and instead apply their creativity to the animation aspect (changing size, aspect ratio, rotation) or having something exciting or unusual happen during the parade. Perhaps a bird flies by or a person photobombs the video!
  • It can easily be shared to the whole class when complete, as well as family members, and then saved as part of a digital STEM portfolio.
  • It seriously pushes the limits of persistence and patience. Stop motion animation is something that takes time and persistence to complete! Students are always so proud of their creations because they know just how much time they put into them.

Get the Resource

While you don't need this Digital Stop Motion Animation resource to complete the activity, I have included a background, various parade floats and vehicles, and step by step instructions so that students can do this project independently. Just download and get started right away!


Christmas Stop Motion Animation

If you celebrate Christmas in the classroom, this stop motion animation movie (or others) is so cute to create! I found just the perfect clip art elements to animate Santa Claus flying across the winter night sky. Here is a video sample:


If you want to create a winter-themed stop motion animation without Christmas theme, building a snowman is the perfect idea. I just love how this one came out:


Get the Resources


Pin these ideas for later:


Stop Motion Animation STEAM Project

Stop Motion Animation for Kids

Is the creativity and imagination of kids the 8th wonder of the world? Sometimes I think it might be. One of my favorite things to do in the makerspace is to observe the kids when they are creating their own stop motion animation projects. It's always a hub of joy and excitement. You can also make this a true STEAM project by exploring science topics, calculating frame rates, and working with numerous tech tools such as photo editing software, microphones, and various animation programs.

There are many apps and programs you can use to create stop motion animation films that are kid-friendly:

  • or iPhone or iPad: Stop Motion Studio, StopAnimator, iMotion, iMovie,
    Frameographer ($), iStopMotion ($)
  • For Android devices: Clayframes, Stopmotion Studio, Stop-Motion
    Movie Creator (Minecraft)
  • For Windows: I Can Animate 2, qstopmotion, Hue Animation Studio 
  • For Chromebooks, you can use the app called "Stop Motion Animator" for physical stop motion. You can also try digital stop motion with google slides and try something like the red ball challenge.
If you have another one you enjoy, please feel free to comment below!


Create a Stop Motion Animation with these Steps

1. Brainstorm ideas for the film.


I'm not going to lie. This is probably the most challenging part of the process when working with groups of kids. One will want superheroes, another will want Star Wars, a third will hate both those ideas and only settle for something really gory. Start with a simple list and set ground rules if there are certain themes you want to avoid. Try to separate the groups by interest. The most important part?

KEEP IT SIMPLE.

Let me say that again slowly.

Keep

it

simple.

It takes such a long time to film a stop motion animation films that you will likely only get 1-2 scenes done. Have the kids focus on one character, what that character is doing in the scene, and what they are interacting with. Try not to have too many props in the scene that need to be adjusted with each frame.

I prefer to have kids work with LEGOs for stop motion animation because it is easy to keep track of where all the pieces are on base plates. If you need to pause filming for a day or the set is disturbed, it's not impossible to set it back up again.

2. Possibly more important than the plot is the lighting.

This might sound crazy at first, but there is nothing worse than capturing hundreds of frames for your stop motion animation only to watch it and see constant light flicker. If you do not set up your lighting, you will have light flicker, either from sun peeking in and out from clouds, or from shadows of the animators. Use two desk lamps to avoid light flicker and cancel out shadows, or invest in some quality lighting. Be sure it isn't so bright that you have glare!

3. Make a plan, Stan.

Have your kids come up with a plan for the scene. They will start to get ideas for the set and solidify the actions their character is taking in the animation. The storyboard doesn't have to be elaborate but it can really help kids define the scene.

4. Design the set.

This will be the highlight of the experience for some of the students. It's where they get to create their world and imagination comes to life. The simplest set can just be a backdrop. A more complicated set can have some props, but try to keep them to a minimum as they can be complicated to work around when filming.

5. The fun part! Filming the stop motion animation.

Okay, well *some* kids will have fun with this part. Many will have the patience to move their characters just a little each frame, but some will get frustrated with this part. If that is the case, you can have the kids switch off being the director or the photographer. They can make sure that all characters in the scene are moving at roughly the same rate as each other, and check to make sure the captured frames look good. If a set gets moved, they can also line it back up again.

6. Editing your stop motion animation film.

Did the set shift in a frame? Maybe you captured a hand in a frame? One frame just doesn't line up quite right? It's time to remove those frames. If you have kids who are skilled at photo editing, they may be able to manually edit frames that didn't capture correctly. This is also a great time to loop any frames that make sense to loop. If the characters are having a dance party, for instance, there is no reason you can't duplicate frames and loop them several times. It will add significantly to the length of the film. You can even drop them in in reverse, like Boomerang for Instagram.

Don't have fancy photo editing software? Try Gimp. It's free!

7. Testing, testing, 1, 2, 3.


This is the most exciting part, next to watching the film. It's time to add sound effects or green screen effects, and record any voice overs. You can have students plan out what they are going to say and write it down, then practice as they watch the animation. Do a practice run, and then record sounds. It might take a few tries to get it right but it will take far less time than all the other steps. You can also add any beginning and ending credits at this time.

8. Movie time! 

I promise that the kids will want to watch their film over and over the first time they see it. Thankfully it is also probably only about 30-60 seconds long.

Here are a few images from past projects:
beach scene set

Minecraft kit animation
simple brick film set
Looking for more stop motion animation project ideas and tips? I have created a guide that supports this activity in a meaningful way. You can check it out here:

https://www.teacherspayteachers.com/Product/Stop-Motion-Animation-STEAM-Project-3211523?utm_source=Momgineer%20Blog&utm_campaign=Stop%20Motion%20STEAM


or pin this idea for later:

Stop Motion Animation STEAM Project for Makerspaces - Meredith Anderson Momgineer

* Thanks to EduClips for many of the clip art images used in the post.