momgineer

Create Homemade Tree Blocks - Natural STEM Toy

Make your own DIY Tree Blocks 


Spring is a great time to make tree blocks. The bark is easy to get off of the branches in spring, and since this is the most time consuming part otherwise, it really makes sense to pencil this into your sprint calendar. If you have any trees that need trimming or can get a few branches off your local freecycle/craigslist/Facebook group, and you don't mind putting in some time and effort, you will end up with a beautiful set of tree blocks your children can play with for many years, and maybe even pass on to their own children!

We had an abundance of ash trees on our property, which were too crowded and not very happy. They worked well for this project, and we get much more enjoyment out of them as blocks than we did when they were trees.

Get started making your own tree blocks

  • tree branches
  • a saw
  • an oven or a warm spot in the sun
  • a putty knife or box cutter
  • ample time and patience
Select your branches. I chose a mixture of thin and thick. You will want to cut them to various lengths, but I tried to cut several the same length so they would work well for building structures. You will probably want to keep them as flat as possible, too, so that if you are building towers they aren't topsy turvy. I used a miter saw, but you can use whatever you have and are comfortable with.

Before de-barking the tree blocks
After you cut them you will want them to dry out a bit; this should help get the bark off. I sun dried mine but you can put them in the oven on the lowest setting for a few hours instead. If you are really lucky, you might get a branch where the bark just falls right off. One of our maple trees just lost a branch and I thought it would be nice to make some more tree blocks to add to our ash ones. The whole bark-removing step, which was the most time consuming of our ash tree blocks last year, took me all of 2 minutes to de-bark an 8 foot long branch. It probably took me about 2 minutes per block last spring to de-bark the ash tree blocks. The other option is to leave the bark on, for a more natural look, and then all you need to do is cut them and sand the exposed surfaces!

drying in the sun
A year later, they still look great!
These blocks have so many uses and if you can find the wood for free and have the tools (or can borrow them), this is such an inexpensive project. Sets like this you can buy can run $40! Eek! To de-bark, I cut into the bark with a blade and then peeled it back with a putty knife or my fingernails. It was fairly time consuming, but I'm really happy with the result. After all of the bark was removed, I sanded all of the block first with coarse sandpaper, and then with fine sandpaper.

Why I think you'll LOVE these 

Not only are these blocks fun to play with, they are a wonderful natural building toy! The smooth wood and weight of them is really amazingly satisfying. Please note that because they are solid wood, they can be quite heavy, so take care with little toes and fingers.


custom t-shirts

I have made custom t-shirts for myself in the past, as well as custom onesies for a new baby, but I hadn't made any with the kids. I thought it would be fun for them to decide what kind of shirt design they wanted, and go to the craft store and pick out the color they liked. Generally they are on sale for either 2 for $4 or 2 for $5, or if they aren't on sale, there are usually coupons you can print for 40% off an item so it's a pretty low cost activity, especially considering you are getting usable clothing out of it. The other thing you need is t-shirt iron on transfer paper (get the dark transfer paper if you are using dark colored shirts) and a printer. I had some paper left over from years ago; you can put several transfers on the same sheet to make it last awhile.


What you need:
  • t-shirt, wash and dry first if new!
  • printer (remember to flip your image left to right, especially if it has lettering!)
  • design (you could draw one of your own, or use a picture, or find some free clip art)
  • iron
The instructions for how to do this will be with whatever iron on transfer paper you use, so I'll just show how we did it but make sure you follow the instructions for your own paper.

Pick out the t-shirts you want to use.
Pick out and print your design, trim around the edges.
Heat up your iron and iron the shirt so it is flat and dry.
Place the transfer where you'd like it and iron it according to your transfer sheet instructions.
Wait for it to cool and then peel off the backing.
Repeat!
Wear!

i-spy bottle

I saw this post recently and it reminded me how I've been wanting to make one of these for awhile with the kids. They have been having fun playing with it and I think we'll make another one so they each have one for car rides.

i-spy bottle
What you need:
  • a cleaned out, dry, transparent container with a lid
  • rice, beans, lentils, bird seed (good idea to freeze overnight first)          
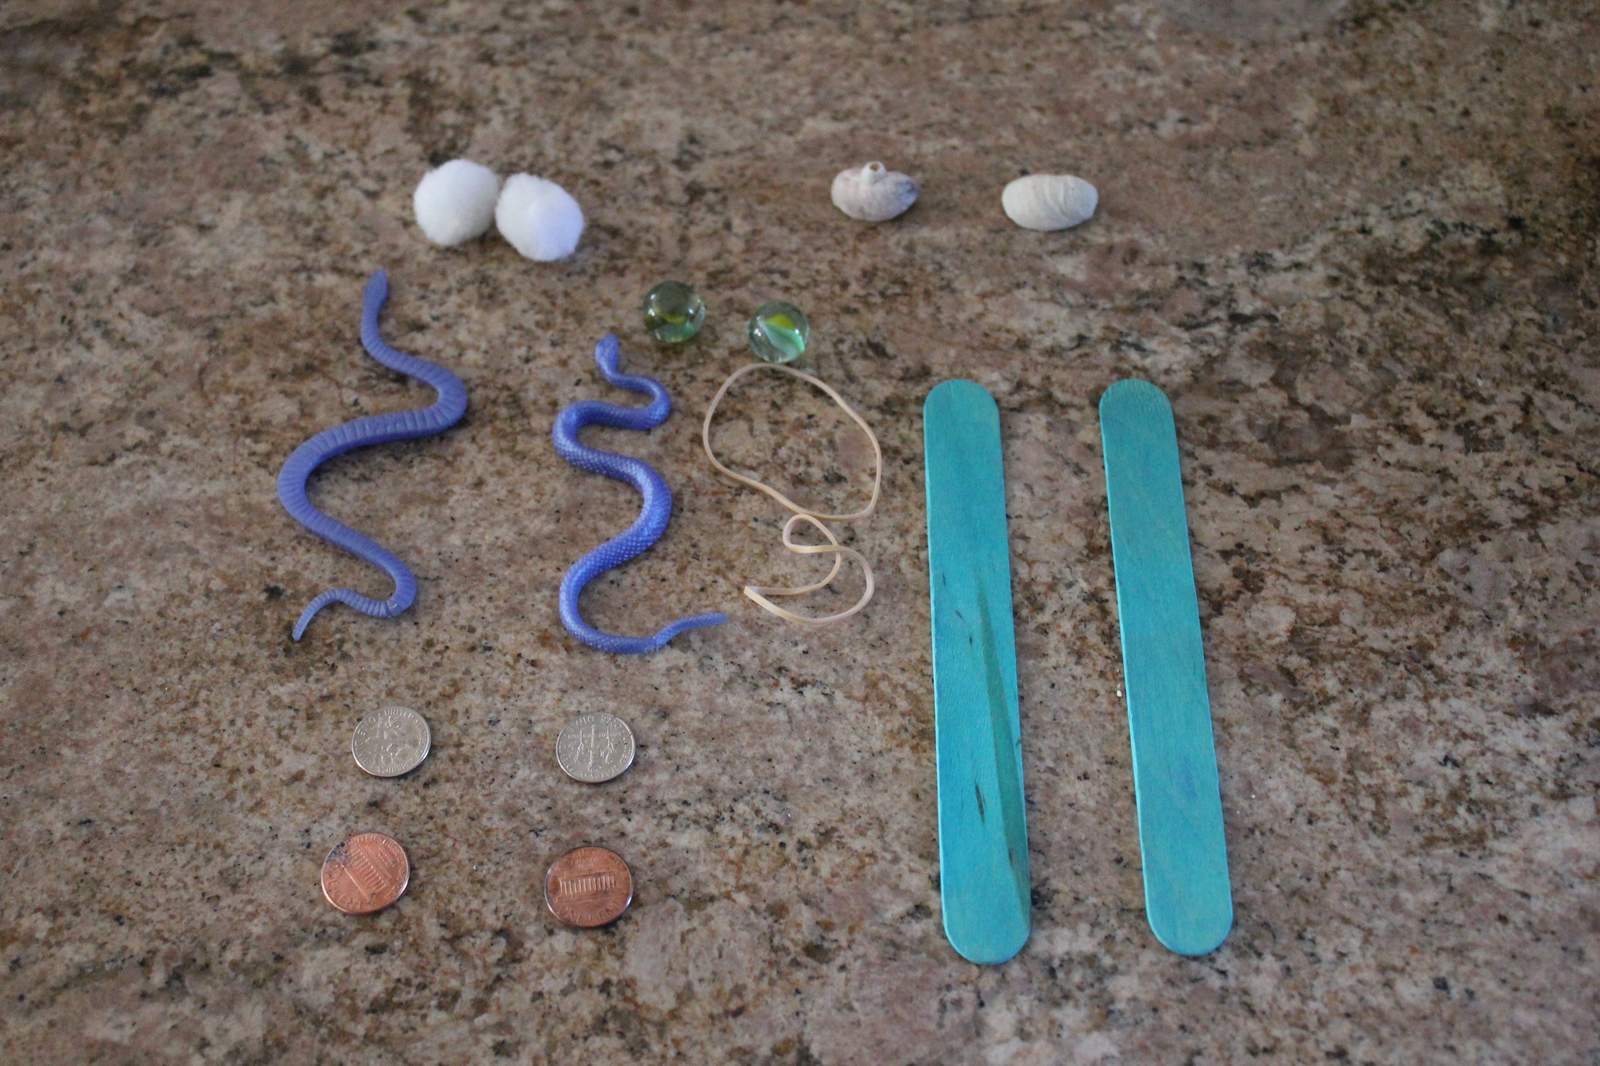
  • objects to spy - you could do a theme or just random items
  • glue
Basically you just fill the bottle with the filler and your objects, making sure to only fill it about 75% of the way so that you are able to shift it around to find things. I decided we would put two of each item in to increase the likelihood of finding at least one of them. I'm glad we went with a variety of shapes/sizes/colors because some of them are very easy to spot for F, and others are much more difficult (like the coins, even I have a hard time finding them!). I added a little bit of glue to the threads on the bottle to help keep the lid on.
    objects in our i-spy container
    filling the bottle

    leaving space makes it easier to manipulate

    counting and sorting apples

    I purchased these little wooden apples from this store while I was making other purchases and knew we would put them to good use. They are super cute and are just the right size for counting and transferring activities, though too small for wee ones that are still mouthing things.

    I had the kids divide them into 5 sets of 20 for dyeing, and then processed them the same way I did the pasta here (use food coloring and rubbing alcohol). I decided to dye some wooden people and rings I'd gotten while I was at it.

    Apples, rings, and people sorted by color.
    Apples before dyeing.
    I'm going to lose my head for dyeing the apples red.
    Some people dyed (ha). The purple came out so deep and brilliant.
    Seriously, it is like a rainbow spewed them out.
    Sorting game.
    H sorts.
    F sorts.
    In addition to the sorting game, we have played UNO with these pieces - each player gets 7 pieces to start with and then one piece starts off the pot. Each player takes turns matching either the shape or color until someone wins by using all their pieces. If they can't match either color or shape, they have to keep drawing pieces from the bag until they get a match.

    bar graphs

    Bar graphs are a useful tool for visualizing discretely measurable data. H & F love to sort objects by color, size, type, etc. and we started making bar graphs a few months ago because I thought they would be a fun teaching tool.

    What you need:
    • paper
    • crayons, markers, or pencils
    • objects to sort
    We made a bar graph for trains this time. F routinely sorts them by color, so I thought it would be fun to see what our train collection looked like in graph form. I drew the axes and labeled them (the child can also do this part), H & F sorted the trains, counted them up, and H colored in the squares on graph paper corresponding to the number of trains we have.

    Bar graph of our toy trains
    1. Set up your graph with labeled axes
    2. Sort your objects.
    F did most of the sorting.
    We decided to include tenders as well.
    3. Fill in the graph (H used colored pencils).
    This is an activity they really enjoy and I hope you do too! You can ask your child which color has the least, most, which have the same number, etc. If you are looking for another math tool you can ask how many more of X colored trains would you need to have the same number as Y colored trains, and so on.

    Simple Transferring Activites for Kids

    Practice Fine Motor Skills with Transferring Activities

    This is a favorite busy activity for younger kids. I suggest varying the objects that are getting transferred to keep this task interesting. It is a great fine-motor activity, and a calming one that can help bring focus as well as develop hand coordination and strength for writing. It doesn't generally hold interest for very long, but can help transition from a hectic atmosphere to a more peaceful one.


    Materials needed:
    • Tweezers (like these for perler beads, cheaper at Michaels) or learning chopsticks
    • Ice cube trays, egg cartons, or other compartmentalized tray
    • Transferring objects:
      • pompoms (easy)
      • cut up sponges (easy)
      • miniature animals (medium)
      • wooden cubes (medium)
      • perler beads (difficult)
      • marbles (difficult)
      • anything else you can think of - perhaps items from a nature walk
    Transfer randomly, or ask your child to try creating a pattern. You could also use color resemblance sorting cubes for this task to make it even more challenging. My big kid decided to make up a pattern (below), while the little one just focused on getting the objects into the ice cube tray. For younger children, try using larger objects, like smooth decorative stones, and have them grasp them with their hands to help develop a tripod grip.

    2. Transfer!
     He did the same pattern in each row, reversed.

    I hope your kiddos enjoy this activity! Sort on!

    toddler dump and fill

    Though this isn't something that holds either H's or F's attention for long these days, it kept them busy for long stretches when they were toddlers. I thought I'd share some of our favorites.

    What you need:
    • Containers
      • Cheese shaker
      • Sugar container
      • Empty coffee cans or other cylinders with plastic tops
      • Empty milk or other jug
    • Fillers
      • Pompoms
      • Chenille sticks
      • Large play coins
      • Straws in different colors/lengths
      • Stretchy snakes
      • Craft sticks
    Some of our favorite containers
    This one is nice because it is only semi-transparent
    Closeup of the slot I cut in the lid.
    Just fill and dump! You can make a sorting game out of it (sort the pompoms by color, or straws by length, etc) or give your child a variety of objects and ask them to sort by which items fit and which are too big.