momgineer: rainy day activities
Showing posts with label rainy day activities. Show all posts

Pair Stare for Blends!

Practicing Blends with a Fun Game

Who doesn't love a fun game? My favorite way to engage learners of all ages is through play, and this game is fun for kids and adults alike! Over the years I have developed a number of these games, and now there is a set of pair stare games for blends!


If you aren't familiar with pair stare, you may want to visit this pair stare post. However, you can get an idea of how it's played by watching the video below:


You can try it out in the image below. Look at the top two cards. Do you see the one and only image or word that is on BOTH cards? Once you find it, do the same with the bottom two cards! 

Why is this game so much fun? No matter how often you play, the game is always slightly different. You can try playing with the cards below. Pick two cards and then look at them until you find the match. It's harder than it seems! Sometimes you think there must not be a match...but I promise you there is. A few things that can help you out:

  • If it's a word or blend, it will always be the same color and font
  • the match will NOT always be the same size
Did you find the answer to the image above?


This game is always different, because when you shuffle the cards, there is a new match! ANY two cards in the deck have one unique match. With over 55 possibilities, it's harder than it initially sounds!

The game also has both words and images, as well as the blends! The words have been carefully selected as easier to read, as you can see above with words like brag, from, and free, while more complicated words that students would not yet be able to read are displayed in image form, such as trampoline, broccoli, and dragon.

L Blends, R Blends, and S Blends

You can find all three blends games in my TpT shop:
https://www.teacherspayteachers.com/Product/Blends-Games-Pair-Stare-BUNDLE-L-Blends-R-Blends-and-S-Blends-4354818?utm_source=Momgineer%20Blog&utm_campaign=Pair%20Stare%20BLENDS

Or save these ideas for later on Pinterest:

STEM Tale - Robin Hood Activity

Fairy Tale STEM Activity for Robin Hood

STEM and literacy are the PERFECT combo to get kids hooked on engineering! I have created a series of STEM fairy tale stories that take a beloved fairy tale and give it a STEM twist!

Robin Hood has gotten himself into a jam. He needs your students to help him design and create a new bow so he can win the archery competition and pay back the money he stole!


Materials Needed for this STEM Fairy Tale Activity

I may earn a small commission for my endorsement, recommendation, testimonial, and/or link to any products or services from this website. Your purchase helps support my work in bringing you downloads of value and information about educational resources. The link below is an Amazon affiliate link. You can read my full disclosure here.

Before Getting Started with the STEM Tale

STEM tales work best if you read the original fairy tale first or do your own storytelling. Discuss the similarities and differences as you read through the story. Another fun thing to do with this STEM tale in particular is to talk about various weapons used in warfare over the ages. One of my favorite book series for hands-on projects with kids is the Mini Weapons of Mass Destruction series:
http://amzn.to/2q9j0Rf

Once I checked out one of these books at my local library, I knew I had to have them all for our own library! They are fantastic as a reference as well, to help kids get ideas on how to use various objects in their designs.

Fairy Tale STEM with the Engineering Design Process 

I have designed STEM tales so that as students read the story, they will follow the engineering design process. If you do multiple STEM tales, the process will become routine for your students and they will start using it when they solve other problems.

Design a Bow for Robin Hood

After brainstorming design ideas for a bow, the students will then choose one to create. They will test out the bow with an arrow (either a pencil or a cotton swab). I prefer using a pencil, because the string grips nicely on the eraser. Please make sure all students start behind a line and only shoot in one direction, or you can construct a simple "shooting range" if you are concerned about injuries. The image above shows three varieties of bow - spoons, craft sticks, and a bamboo skewer, all with string. This is an example of how to load the arrow:


Testing the Bow Design

Before testing, go over the ground rules several times. One violation and testing should immediately stop!
  • Bows can only be aimed at targets (use a printable target or simply stacked cups)
  • Only shoot when the range is clear
  • Retrieve arrows when instructed to do so

Growth Mindset and STEM

STEM tales are the perfect way to model a growth mindset. It is rare for an engineering design to work perfectly on the first attempt, so students will likely experience failure at some point. In improving the designs and working together, they will work through the issues and solve the problem. In this challenge, I provided long balloons and most of the kids wanted to try them out (what kid doesn't love a balloon?). What they learned is that the balloons stretch too much and the arrow doesn't fly as well as with a string.

Optional - Prepare the Bow Ahead of Time

The instructions for these bows are in the Mini Weapons book. The craft sticks are soaked in water so they are easier to bend, then you set them into the shape and let dry overnight:


This is a good option if you want to keep variability low. You can then Have the students try various rubber bands or strings.

To find the full resource, which includes an 8-page booklet, check list for self-evaluation, and tips, plus 3 bonus STEM challenges, visit this link:

 
 Pin the idea for later:

Design and create a bow for Robin Hood! In this STEM tale, help Robin Hood repay his debts by winning the archery competition. | Meredith Anderson - Momgineer

To read more about how to conduct a STEM challenge, visit this post:

http://momgineer.blogspot.com/2016/09/how-to-run-successful-stem-tale.html

To see all posts in this series, click here:

STEM Tales Blog Series


How to Use Fidget Spinners for a STEM Challenge

Fidget Spinners Driving you Crazy?

The whir might have faded to background noise to you at this point, or maybe you can't get it out of your head. Before you ban fidget spinners completely, why not put a spin on the fidget fad and engage your students in a STEM challenge?

Disclaimer: I may earn a small commission for my endorsement, recommendation, testimonial, and/or link to any products or services from this website. Your purchase helps support my work in bringing you downloads of value and information about educational resources. The link below is an Amazon affiliate link. You can read my full disclosure here.

Fidget Spinner STEM Challenge

Turn that Obsession into a Learning Opportunity

How to Use Fidget Spinners for a STEM Challenge. Learn the science first, then follow the engineering design process. Use math to analyze and improve the design! | Meredith Anderson - Momgineer

Start off by learning the science of rotational motion. I have provided informational text about inertia, angular velocity, torque, and more so that students first get an understanding of the spinners from a scientific perspective. This is reinforced with hands-on experiments and demonstrations, such as noting how the center of mass will change based on where weights are placed on an object.

Follow the Engineering Design Process

How to Use Fidget Spinners for a STEM Challenge. Learn the science first, then follow the engineering design process. Use math to analyze and improve the design! | Meredith Anderson - Momgineer
The engineering design process (EDP) is the method engineers use to solve problems. It has some similarities to the Scientific Method so if you haven't used the EDP before, read through the steps:

ASK - What is the problem? Has it been solved before?

IMAGINE - Some solutions to the problem. How large will your spinner be? How many arms will it have? What materials are available to use? Do you have design constraints?

PLAN - Sketch your design and label it.

CREATE - Build the design and then test it. How long does it spin? Does it fit comfortably in the hand to spin it? Is it assembled well and symmetric? Record and analyze the data.

IMPROVE - Can you make it spin more smoothly or for longer? What might be causing friction?

SHARE & REFLECT - Share your design with someone else. What do they think of it? Could their feedback help you improve the spinner even more?

Math Extension Activity 

How to Use Fidget Spinners for a STEM Challenge. Learn the science first, then follow the engineering design process. Use math to analyze and improve the design! | Meredith Anderson - Momgineer

How much would it cost to make 1000 spinners? Students create a Bill of Materials (BOM), calculate the cost to assemble the spinner, and find the volume to calculate the cost of the packaging. Why is this important? Engineers need to be mindful of costs when creating a new product. What if the cost of the raw material goes up? How can you cut costs in a different way. Packaging design is a whole branch of engineering - think about all the different packages you encounter in goods you purchase. An engineer was involved in the design of that package, cost was a very important factor in the package design.

Get Creative with Marketing and Graphic Design

How to Use Fidget Spinners for a STEM Challenge. Learn the science first, then follow the engineering design process. Use math to analyze and improve the design! | Meredith Anderson - Momgineer
Students need to think about who might buy their spinner and then create a marketing campaign to hook potential buyers! They can also create a fun design on a traditional spinner to catch a shopper's eye. Why is this step important? You can have the best product in the world, but if nobody knows about it, it won't sell and ultimately will fail in the market.

Why STEM?

How to Use Fidget Spinners for a STEM Challenge. Learn the science first, then follow the engineering design process. Use math to analyze and improve the design! | Meredith Anderson - Momgineer
Not only do students work in small teams, which helps foster community and teamwork, but they also learn to fail and embrace a growth mindset. You will see amazing problem-solving and creative thinking with this project. Students use higher-order thinking skills in their STEM projects, and they can use those skills in other academic areas as well. Because there are so many possible solutions to this problem, there are many avenues to success. You may even inspire a student to come up with a new and unique spinner that is better than commercially available ones!

Find it on TpT 

The full resource can be found on Teachers pay Teachers. It includes everything shown here and more. There are samples, teacher notes, and planning pages to help you make this a successful challenge in your classroom or at home. If you are looking for some tips and tricks to try this on your own, though, read on for a video.

https://www.teacherspayteachers.com/Product/Fidget-Spinner-STEM-Challenge-Follow-the-Engineering-Design-Process-3141202?utm_source=Momgineer%20Blog&utm_campaign=Fidget%20Spinner%20

Easy Shopping Links

Amazon affiliate links:
Neodymium Magnets or here
Skate Bearings
Gorilla Tape 
Tin of Marbles or here

Watch the Video to Learn More 

Get an overview of the challenge and some DIY tips on YouTube!

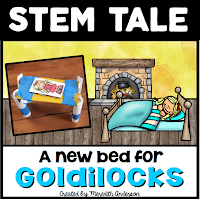
STEM Tales - A new bed for Golidlocks!

Fairy Tale STEM Activity - Goldilocks and the Three Bears

Try a hands-on STEM challenge with Goldilocks and the Three Bears! 


This STEM activity is designed for lower elementary kids. I am so excited to share some details about it! STEM tales introduce the youngest budding engineers to STEM, by taking a familiar story and using it to walk through the engineering design process. Do you love telling and re-telling stories with your kids? Do you ever change the ending to spice it up a bit? That's exactly what STEM tales is all about!

Integrate Literacy and STEM with Fairy Tales

The 8-page book provides an alternative ending to this story. Your students need to help make a bed for Goldilocks. Goldilocks is simply a printed out figure, which you can add weigh to with either small masses, pennies, or washers.
Using whatever crafting materials you have handy (index cards and tape are really all that is needed, but feel free to use other supplies as well), create a new bed for Goldilocks.

The Testing Phase of the STEM Challenge

Is the bed large enough? Will it hold the weight of the figure? You will be surprised at the designs your students come up with! Designing and creating a bed for Goldilocks is a way for students to bring the fairy tale alive.


After you have tested out the beds, it's time to introduce the bear family to the challenge (mama, papa, and baby, who is the same size as Goldilocks).


You will add heavier weights to mama and papa bear, and then test the designs again. This is a great way to demonstrate why it's important to know your design criteria before starting a STEM challenge! Mama bear may fit on some and not others, or papa bear may fit but weigh too much and collapse the bed.
 

Get the Goldilocks Fairy Tale STEM Challenge

Here is the link to the full resource. In addition to all the steps above, the 8-page story  book guides students through the engineering design process and also includes a self-evaluation check list.

Goldilocks STEM challenge 

Or pin the idea for later: 
Fairy Tale STEM Activity - Goldilocks and the 3 Bears. Design and create a new bed for Goldilocks! Meredith Anderson Momgineer


How to Conduct a STEM Tale Challenge


To read more about how to conduct a STEM challenge, visit this post:

http://momgineer.blogspot.com/2016/09/how-to-run-successful-stem-tale.html

To see all posts in this series, click here:

STEM Tales Blog Series


Emotionally Connect with your Child through Physical Play

This is a re-post of an earlier post, but I thought it was worth sharing again.

We were fortunate enough to attend a workshop last week led by Larry Cohen (of Playful Parenting). When he released his book The Art of Roughhousing, he did a series of workshops to explore this fun topic. It is definitely worth a read! Some kids need to connect physically in order to connect emotionally. If your child is sensory-seeking, he may respond to some of these ideas. You may find you enjoy the games as much as your child does, and you will be sure to have lots of belly laughs and smiles. Sometimes a child that may seem defiant, just needs to feel like their voice is meaningful and is being heard. When a child is occasionally given a "powerful" role, they may become more cooperative at other times. Why not give it a try?


Some fun roughhousing games we have played in the past:

The wriggle game:
This is also called "You can't get away from me!" but I like the term wriggling. Basically you encircle your child with your arms (but don't hold them tightly) and say something like "I bet you can't wriggle out of here!" If it is their first time, make sure you don't make it too difficult to get out. It will help build up their confidence. As they get better at it, try moving all around with them as they are wriggling to make it more difficult for them to get out from your arms.

The push down game:
This game is fun from the toddler years on. For a toddler, squat down to their level and tell them to try to push you over. If you're squatting, it will probably not take much effort for them to throw you off balance. Fall back and elaborately groan about how they pushed you over, and then ask if they want to do it again. They will most likely get a big kick out of seeing an adult fall over for a change, instead of themselves. For older kids, kneel but keep your body tall so you are close to their height and tell them to push your shoulders, or hold up your hands like you are going to high-ten them and tell them to push your hands.


The bridge game:
This is best played with another adult around, though it can be done solo as well. Lie down on your back with your feet and the other person's feet touching sole to sole. Lift your legs up (while keeping your feet touching) to make an inverted V. Tell the child(ren) to run under the bridge without getting crushed (legs lowered). For older kids, you can open your legs to "catch" them in the bridge and dare them to escape. They will most likely delight in running and crawling under the bridge over and over.

Feats of strength:
It's a far cry from the Festivus feats of strength, but this is a lower-energy way to encourage body awareness and strength. If you've had a long day and need to sit on furniture instead of the floor, or you're nursing your little one and the older one needs attention, this can work for that.  Put your arms up like you are going to clap them, but spread them a little further apart. Ask if they can push your hands together. Resist. Repeat!

These never seem to get old with H&F. A few things to be mindful of:
  • Check in with your child periodically to make sure they are still having fun.
  • If your child tends to get riled up easily and has a hard time re-centering, take breaks every so often to make sure they don't feel out of control of themselves. One way we do this is by slow deep breathing and counting slowly backwards from 10.
  • Try to reserve time for roughhousing as a parent-child activity and you may spare yourself issues that arise from child-child roughhousing. If there is an outlet for this kind of energy, children will be less likely to unleash on their sibling or friend.
We played some other fun physical games at the workshop, including pillow fighting, which I'm sure will be detailed in the book. Do you have favorite roughhousing games you play with your kids?


The Art of Roughhousing

This is a physical extension of playful parenting. It takes conscious action to not immediately react in times of frustration with your child, especially if you are tired yourself. However, being goofy and playful is one of my best parenting tools, even as my children grow older.

Rainy day fun!

Well, spring finally arrived! It rained *all* day yesterday, so I was thankful I had a new card game waiting for us to play. This one was an instant hit, which is no surprise as my kids seem to love just about every Gamewright game we have tried. The best part of this game is that even when you think you might be ahead, you could be wrong. The strategy is complex. You might think you will score big, only to lose a lot of points at the end or finish out with useless cards. The images on the cards are so adorable that you will want to snuggle the sushi! The educational factor is low (basic addition), but it's a lot of fun and fast-paced.


A fun little game and a great one to pass 10-15 minutes. You do need a score sheet as you play three rounds, however there is no reason you couldn't just play one round instead and not keep score
http://www.amazon.com/Sushi-Go-Pick-Pass-Card/dp/B00J57VU44/ref=sr_1_1?s=toys-and-games&ie=UTF8&qid=1434457950&sr=1-1&keywords=sushi+go
Please note: this is not an affiliate link, and I did not receive anything for this review. I purchased this game and just wanted to share our thoughts on it!

Draw and Write Paper: FREEBIE FRIDAY!

Draw and Write Paper


A few years ago I created some simple draw and write paper to use at home with our Draw Write Now books. I decided to update the paper and add several more options! These are available for free download at my Teachers pay Teachers store:

Draw and Write Paper
Create short stories, work on sequencing, instructions, and more, and illustrate them as you write!

http://momgineer.blogspot.com/search/label/download?max-results=12

Lego Sandbox

Tuggy the tugboat had a good life as a sandbox when my oldest, now almost 8, was a toddler. We also used it as a baby pool! It's been sitting in the yard for years now, mostly because I've been too lazy to do anything about it. I needed an easy day at home after yesterday (details of that to follow) so we went outside and hosed off Tuggy and the boys helped me get it up to the deck and clean it up. We then brought it inside and they emptied out all of their Legos inside. The Legos had been sorted by color, but they wanted to mix them up, so we'll leave the Legos in Tuggy for a few days until I get motivated to list it on Freecycle.


So far they have been playing in it for over an hour, so that's good enough for me!

What happened yesterday? Mr. Big-Emotions-Six-Year-Old slammed the French door, then kicked a pane, and what a pain it was to clean up all that glass!


There was glass at least 10 feet from the door on both sides, and in his and my feet. Of course he did this right after I sat down to eat lunch, which did not get eaten until at least an hour later. I am proud to say I kept my cool and quietly cleaned everything up and waited to speak with him about it until after the cleaning was done and I'd eaten my lunch. Why do we even have a glass door inside the house with two energetic children? My husband thought they were old enough to be responsible around it (I had him remove the door right after we moved in and it had been in the garage until a few months ago). Sigh. What this picture doesn't show is that there were Legos all over the floor as well, which I had to pick up one by one, and then clean.