October 2011 - momgineer

Nature Activitiy for Kids: Leaf and Bark Rubbing Journal

Create a Leaf and Bark Journal


I ordered some blank books in advance of this project, but you could easily do this on paper. Autumn is the perfect time of year to do this in the northeast! We gathered leaves for rubbings from our immediate neighborhood and did bark rubbings while we were out walking around, labeling the bark rubbings if we knew the kind of tree.

What you need:

Decorate your Leaf and Bark Journal 

I found some beautiful leaf stickers on sale at Michaels (don't forget your teacher or homeschooler discount, too!) and had the kids decorate their books:


We then went outside, finding many of our leaves right in our own yard. We did our bark rubbings, noting the difference between the young and old trees, and we collected our leaves.


Use a Leaf Chart

We brought our laminated leaf morphology chart to identify the types of leaves we found:


When we brought the leaves in we started rubbing and cutting them out to fit in our books, leaf on left, bark on right:

Another one:

I really enjoyed this activity and we plan to keep adding to it or start another one when it is full. You could also try pressing the leaves or laminating them to save them.

Kick this Activity up a Notch 

If you have older kids, they will still enjoy this activity, but why not take it a step further? Ideas of topics to discuss:
  • Tree life cycle
  • Where do the leaves go after they fall?
  • Why do trees have bark? What is its function?
  • What do leaves do?
  • What do you notice about the types of trees that grow where you live? How are they different from trees that grow in other climates? Why?

window ghosts

These were done basically the same way as our Valentine's Day window decorations. The kids really love tearing up tissue paper so I always save as much as I can from gifts or packaging.

What you need:
  • clear contact paper
  • tissue paper, torn or cut into small pieces
  • stickers or stick on googly eyes, and any other decorations you'd like
Just cut out some ghost-shaped templates, peel off the backing, stick on your tissue paper, and decorate!
I cut out some templates of ghosts on the contact paper.

Making ghosts.
"Happy ghost"
"Silly ghost"
From outside the window.

    sink or float?

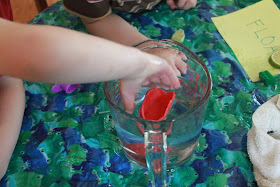
    This is a fun experiment to do, because the kids can decide which of their toys/craft supplies they would like to test (as long as they are waterproof). It can be surprising which items will float in water and which items will sink. This is hands-on learning of buoyancy and density!

    Part 1: Random objects
    What you need:
    • large glass/plastic cup or bowl
    • items that will sink or float! (ideas: marbles, paper clips, lemon slice with rind off, legos, lemon slice with rind on, plastic toy animals, craft sticks, sponges, small bowls or cups, a balloon filled with air, a water balloon, a feather, a ball of clay, a boat made of clay, boats made of other items like craft sticks, etc.)
    Have them guess which items might sink or float ahead of time, and see if they're right!  We used part of the Thames and Kosmos Little Labs Boats for this experiment, but it is not necessary to buy the kit to do this experiment.
    Sinking marble.
    Floating clay boat.
    Floating marble in the boat.

    Lego floating.
    You can sort the objects by whether they float or sink.

    Part 2: Eggs
    What you need:
    • 1-3 eggs (one for each glass or just keep reusing the same one)
    • Three glasses, pitchers, or bowls
      • Fill one with regular water
      • Fill one with heavily salted water (stir well)
      • Fill one halfway with salt water, and keep a small pitcher of tap water on hand
    Ask your child what he thinks will happen when he puts the egg in each glass. For the third glass, put the egg in so it will float to the top of the salt water (salt water is more dense than an egg), and then slowly pour the tap water on top. It will keep the egg floating halfway in the glass:

    painting pine cones

    This is a great activity to do outside on a nice autumn day. It is a wonderful fine motor and attention-building activity; painting an entire pine cone takes a lot of focus and time. Collect your pine cones on a nature walk ahead of time if you don't have any nearby.

    I ended up filling another paint cup with glue. Paint the glue on with a paint brush and then sprinkle the glitter on. Glitter in a shaker bottle is handy for this!
    Getting set up.
    What you need:
    • pine cones
    • washable paint
    • paint brushes
    • smocks (it gets messy!)
    • glue and glitter (optional)

    Concentrating.

    It's hard to get in all the nooks and crannies!

    Painting!

    Glittery.
    Letting them dry.
    Pin this idea for later:

    Painting pine cones is a fun nature art activity for little ones! Find and collect pinecones on a nature walk and then paint and decorate them. | Meredith Anderson - MomgineerPainting pine cones is a fun nature art activity for little ones! Find and collect pinecones on a nature walk and then paint and decorate them. | Meredith Anderson - Momgineer